
Remember the sheer joy of a fall festival? The crisp air, the crunch of leaves, and that one perfect caramel apple that was somehow both amazing and impossible to eat gracefully.
You’d take one bite, and suddenly you’ve got a sticky chin, caramel in your hair, and a nagging fear for your dental work. It’s a delicious mess.
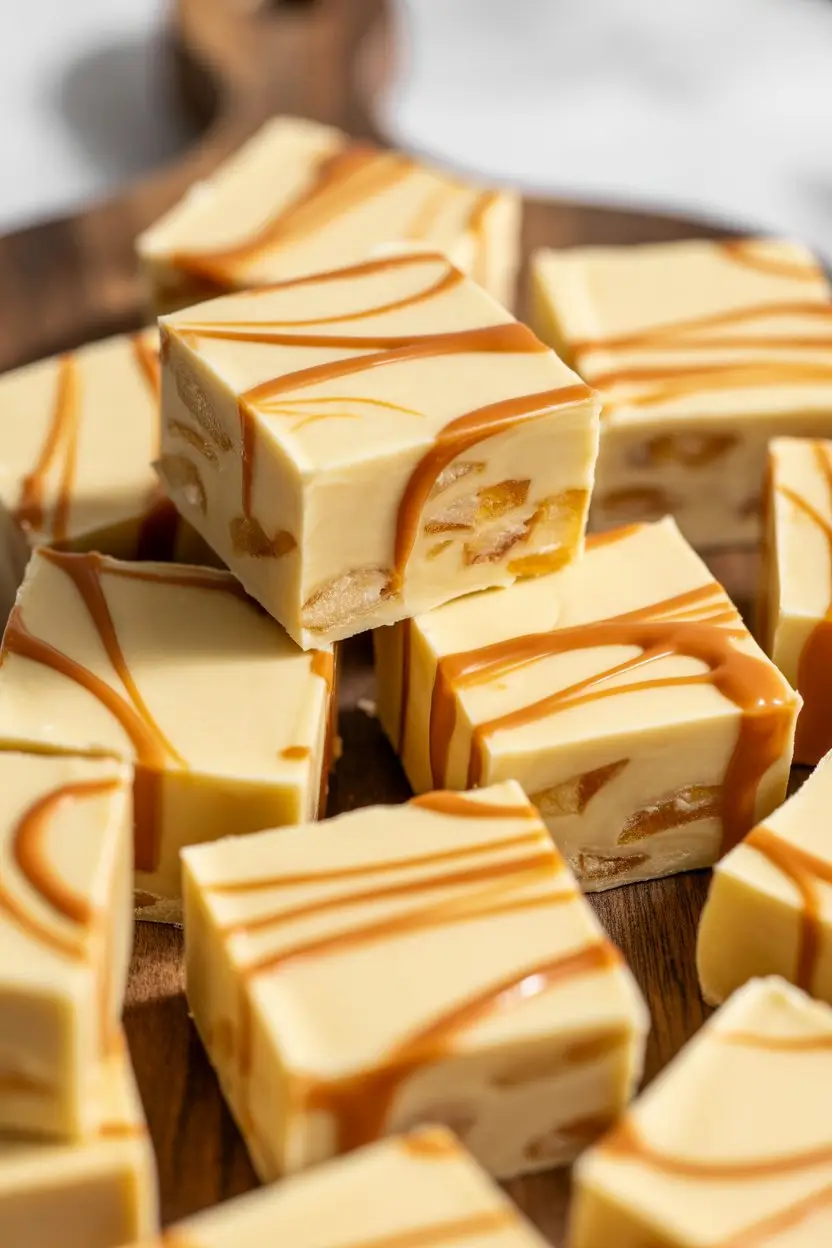
I wanted all that classic fall flavor without the sticky predicament. The solution? Packing all that gooey caramel and tart apple goodness into a simple, no-fuss fudge.
This recipe is my answer. It’s creamy, rich, and melts in your mouth, giving you the perfect bite of autumn every single time. No mess, all magic.
What You’ll Need
Grabbing your ingredients is the first step. Here’s a quick list of everything required to bring this delightful fudge to life.
- 3 cups white chocolate chips
- 1 (14-ounce) can sweetened condensed milk
- 1/4 cup unsalted butter, cubed
- 1/2 cup soft caramel candies, unwrapped (about 20-25 individual caramels)
- 1 tablespoon heavy cream
- 1 cup dried apples, finely chopped
- 1 teaspoon apple pie spice
- 1/2 teaspoon vanilla extract
- Pinch of salt
Pro Tips for Perfect Fudge
I’ve made my share of fudge flops so you don’t have to. Here are a few hard-earned tips to guarantee success on your first try.
1. Low and Slow is the Way to Go.
White chocolate is notoriously fussy. If you heat it too quickly, it can seize up and become a grainy, unusable mess. Melt your chocolate, butter, and condensed milk over low heat, stirring constantly until it’s smooth. Patience here is your best friend.
2. Use Dried Apples Only.
This is a big one. Fresh apples release a lot of water when heated, which will prevent your fudge from setting properly. Finely chopped dried apples give you all the flavor without the extra moisture. Trust me on this.
3. The Parchment Paper Sling.
Don’t just grease your pan. Line it with parchment paper, leaving some overhang on two sides to act as “handles.” This creates a sling that lets you lift the entire block of fudge out of the pan effortlessly for perfect, clean cuts.
4. Don’t Overmix the Caramel.
When you drizzle the melted caramel over the top, you want to create beautiful swirls, not a completely blended mixture. Use a knife or toothpick to gently drag the caramel through the fudge just a few times. Less is more for that professional marbled look.
Tools for the Job
You won’t need any fancy equipment. Just a few kitchen basics will do the trick.
- 8×8 inch baking pan
- Parchment paper
- Medium saucepan
- Small microwave-safe bowl
- Silicone spatula or wooden spoon
- Sharp knife
- Measuring cups and spoons
Substitutions and Variations
Feel free to play around with this recipe! It’s very forgiving. Here are a few ideas to get you started.
| Ingredient | Substitution Idea | Notes |
|---|---|---|
| White Chocolate Chips | Butterscotch Chips | Adds a deeper, buttery flavor. |
| Dried Apples | Toasted Pecans | Chop them coarsely for a nice crunch. |
| Apple Pie Spice | Cinnamon & Nutmeg | Use 3/4 tsp cinnamon and 1/4 tsp nutmeg. |
| Soft Caramels | Caramel Sauce | Use a thick, high-quality jarred sauce. |
Make-Ahead Tips
Fudge is one of the best make-ahead desserts. You can easily prepare it a few days before you need it.
Simply follow the recipe and let the fudge chill completely. Once it’s firm, you can either store the entire block wrapped tightly in the pan or lift it out, wrap it in plastic wrap, and then in foil. It will keep in the refrigerator for up to two weeks.
How to Make Caramel Apple Fudge
Ready to make some magic? Let’s get to it.
Step 1: Line your 8×8 inch pan with parchment paper, leaving an overhang on two opposite sides. This will help you lift the fudge out later. Set it aside.
Step 2: In a medium saucepan, combine the white chocolate chips, sweetened condensed milk, and cubed butter. Heat over low heat, stirring constantly with a spatula until everything is melted and smooth.
Step 3: Remove the saucepan from the heat immediately once the mixture is smooth. Stir in the chopped dried apples, apple pie spice, vanilla extract, and salt. Mix until just combined.
Step 4: Pour the fudge mixture into your prepared pan and spread it into an even layer with your spatula.
Step 5: In a small microwave-safe bowl, combine the unwrapped caramels and the heavy cream. Microwave in 20-second bursts, stirring in between, until the caramel is melted and smooth.
Step 6: Drizzle the melted caramel over the top of the fudge. Use a butter knife or a toothpick to gently swirl the caramel into the fudge. Don’t overdo it!
Step 7: Refrigerate the fudge for at least 4 hours, or until it is completely firm. For best results, let it chill overnight.
Step 8: Once firm, use the parchment paper handles to lift the fudge out of the pan. Place it on a cutting board and slice it into small squares with a sharp knife.
Nutrition, Diets, and Pairings
Here’s a little more info to help you enjoy your fudge to the fullest.
Dietary Swaps
- For a Dairy-Free Version: Use dairy-free white chocolate chips, coconut-based sweetened condensed milk, and a plant-based butter substitute.
- For Lower Sugar: Look for sugar-free white chocolate chips and sugar-free caramels. The taste will be slightly different, but still delicious.
Nutritional Snapshot
This is a treat, so the numbers reflect that! The values are estimates per square.
| Nutrient | Estimated Amount |
|---|---|
| Calories | ~150 kcal |
| Fat | ~8g |
| Carbohydrates | ~18g |
| Sugar | ~16g |
Meal Pairings & Efficiency
This fudge is rich, so it’s perfect as a standalone treat after dinner. It pairs wonderfully with a hot cup of black coffee or a spiced chai latte to cut through the sweetness.
For cooking efficiency, get all your ingredients measured and ready before you turn on the stove. This is called “mise en place,” and it makes the whole process smoother since fudge comes together quickly.
Leftovers and Storage
Storing this fudge is simple. Place the cut squares in an airtight container.
You can store it at room temperature for up to a week, but I prefer keeping it in the refrigerator. The chill keeps it firm and fresh for up to two weeks. For best flavor, let it sit at room temperature for about 10 minutes before serving.
Frequently Asked Questions
Q1. My fudge is grainy. What did I do wrong?
Ans: Graininess is almost always caused by overheating the white chocolate. Melting it on a heat that’s too high or for too long causes it to seize. Next time, use the lowest possible heat setting and remove it from the stove the second it’s smooth.
Q2. Can I use fresh apples instead of dried?
Ans: I strongly advise against it. Fresh apples contain a lot of water, which will ruin the texture of the fudge and prevent it from setting properly. Stick with dried apples for that concentrated flavor and perfect consistency.
Q3. My fudge didn’t set. How can I fix it?
Ans: This usually happens for one of two reasons: incorrect measurements (not enough chocolate or too much liquid) or not chilling it long enough. Make sure it chills for at least 4 hours. If it’s still soft, you can try putting it in the freezer for an hour to see if that helps it firm up.
Q4. Can I freeze this fudge?
Ans: Yes! Fudge freezes beautifully. Wrap the squares individually in plastic wrap, then place them in a freezer-safe bag or container. It will last for up to 3 months. Let it thaw in the refrigerator before serving.
Wrapping Up
There you have it—a taste of fall, all packed into one perfect, easy-to-make square. No more sticky fingers or complicated candy thermometers. Just pure, creamy, caramel apple delight.
I hope you have as much fun making (and eating) this fudge as I do. It’s a perfect treat for sharing, gifting, or just keeping all to yourself.
Give it a try and let me know how it turns out! Drop a comment below with your experience or any questions you have.