
Ok, let’s be real for a second. That first day you feel a chill in the air? It’s like a switch flips in our brains. Suddenly, it’s all about sweaters, cozy blankets, and, of course, pumpkin everything.
But who has the time (or the energy) to bake a whole pumpkin pie from scratch? I know I don’t. Plus, sometimes you just want a little bite of that classic fall flavor without committing to a giant slice of pie.
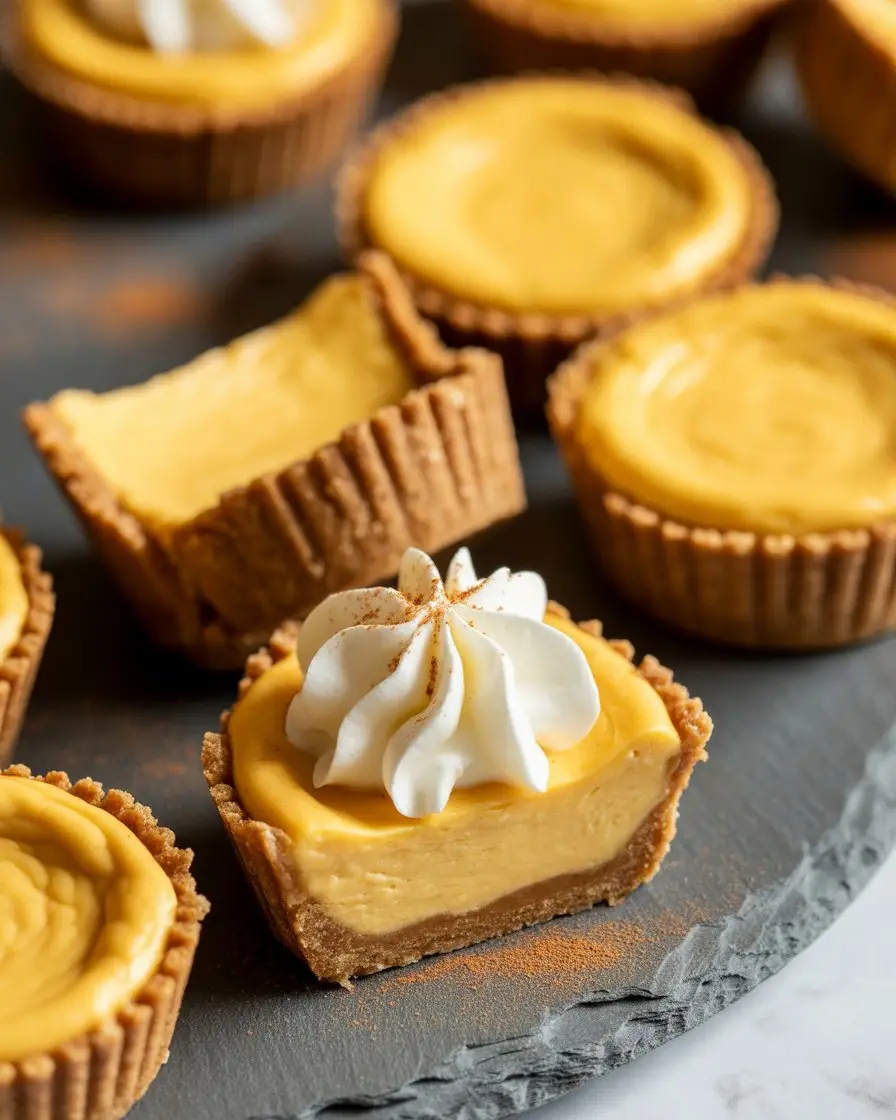
That’s where these little guys come in. They’re like the greatest hits of a pumpkin pie, all packed into one perfect, poppable bite. It’s all the good stuff without the drama.
So, I thought I’d share how you can get that cozy, pumpkin-spice-and-everything-nice feeling in about 30 minutes. It’s almost too easy.
What You’ll Need
Here’s the simple list of ingredients. Nothing too crazy, and you probably have most of it already.
For the Crust:
- 1 cup graham cracker crumbs (about 8-9 full crackers)
- 3 tablespoons unsalted butter, melted
- 2 tablespoons brown sugar
For the Pumpkin Filling:
- 8 ounces cream cheese, softened to room temperature
- 1 cup pumpkin puree (not pumpkin pie filling!)
- 1/2 cup granulated sugar
- 1 large egg
- 1/2 teaspoon pumpkin pie spice
- 1/4 teaspoon vanilla extract
- A pinch of salt
The Tools for the Job
You don’t need a professional kitchen for this. Just a few basics.
- A 12-cup muffin tin
- Paper or silicone liners
- Mixing bowls (one for the crust, one for the filling)
- An electric mixer (handheld or stand)
- A spatula
- Measuring cups and spoons
Pro Tips
I’ve made these a bunch of times and have learned a few things the hard way. Here are some tips so you can get them perfect on your first try.
- Room Temperature is Key: Seriously, don’t rush this. If your cream cheese is cold, your filling will be lumpy. Let it sit out on the counter for at least an hour. It makes a HUGE difference in getting that silky smooth texture.
- Don’t Overmix the Filling: Once you add the egg, mix just until it’s combined. If you beat too much air into it, the bites can puff up in the oven and then sink and crack as they cool. You’re not making a souffle here.
- The “Tap and Settle” Trick: Before you pop the muffin tin in the oven, give it a few firm taps on the counter. This helps release any air bubbles in the filling, which also helps prevent cracking. It’s a simple step that makes them look so much better.
Substitutions and Variations
Don’t have something on the list? Or just want to mix it up? I got you. There’s a lot of room to play here.
| Ingredient | Substitution Idea | Notes |
|---|---|---|
| Graham Cracker Crumbs | Gingersnap or Biscoff cookies | Adds a spicy or caramel flavor. |
| Cream Cheese | Vegan cream cheese | Works well for a dairy-free version. |
| Granulated Sugar | Maple syrup or coconut sugar | You may need to adjust the amount. |
| Pumpkin Pie Spice | Make your own! | Mix cinnamon, nutmeg, ginger, and cloves. |
How to Make Pumpkin Pie Bites
Alright, let’s get to the good part. This process is super straightforward.
Step 1: First things first, preheat your oven to 350°F (175°C). Then, line a 12-cup muffin tin with paper liners. This is a non-negotiable step unless you enjoy scrubbing baked-on cheesecake off your pans.
Step 2: In a small bowl, mix your graham cracker crumbs, melted butter, and brown sugar. It should look like wet sand. Spoon about a tablespoon of this mixture into the bottom of each muffin liner.
Step 3: Use the bottom of a small glass or your fingers to press the crust down firmly and evenly. Bake this for about 5 minutes. This little pre-bake step keeps the crust from getting soggy later. Set it aside to cool a bit while you make the filling.
Step 4: In a larger bowl, beat the softened cream cheese with an electric mixer until it’s completely smooth and has no lumps. Scrape down the sides of the bowl to make sure you get everything.
Step 5: Add the pumpkin puree, granulated sugar, pumpkin pie spice, vanilla, and salt. Mix on low speed until it’s all just combined. You want a nice, uniform orange color.
Step 6: Add the egg and mix on low again, but only until the yolk disappears into the batter. Remember that pro tip about not overmixing? This is where it counts.
Step 7: Divide the filling evenly among the 12 muffin cups, right on top of the crusts. They should be about three-quarters full.
Step 8: Bake for 20-22 minutes. The center should look set but still have a very slight wobble when you gently shake the pan. They’ll continue to set as they cool down.
Step 9: Let them cool completely in the muffin tin on a wire rack. Then, and this is important, transfer them to the refrigerator to chill for at least 2 hours, or even overnight. They taste way better cold.
Diet Swaps, Pairings, and Other Good Stuff
Want to fit this into a specific diet? Or just want to know what to eat with it? Here’s a quick guide.
| Category | Suggestion |
|---|---|
| Gluten-Free | Use gluten-free graham crackers or an almond flour crust. |
| Vegan | Use vegan cream cheese, a flax egg, and plant-based butter. |
| Lower Sugar | Use a sugar substitute like erythritol or stevia. |
| Best Pairing | A strong cup of coffee or a chai tea latte. |
| Efficiency Tip | While the crusts are in their 5-minute pre-bake, start making the filling. |
As for nutrition, these are treats, not health food. But for what it’s worth, each bite is much lighter than a full slice of pie. You’re looking at roughly 150-180 calories per bite, depending on your exact ingredients.
Make-Ahead and Storage Tips
These are actually perfect for making ahead of time. In fact, they need to chill, so it’s almost required.
You can make the entire recipe up to 3 days in advance. Just keep them covered in the refrigerator. The flavors actually get even better after a day.
For leftovers, store them in an airtight container in the fridge. They’ll stay good for up to 5 days. You can also freeze them! Place them on a baking sheet to freeze individually, then transfer them to a freezer-safe bag. They’ll last for about a month.
Frequently Asked Questions
Q1. Can I use fresh pumpkin puree instead of canned?
Ans: Yes, you can! Just make sure it’s thick. Sometimes fresh puree can be a little watery. If it is, let it drain in a cheesecloth-lined strainer for a bit to get rid of the excess liquid before you use it.
Q2. Why did my pumpkin pie bites crack on top?
Ans: This usually happens for two reasons: overmixing after adding the egg, or overbaking. Mix on low just until the egg is combined, and pull them from the oven when the center is still just a little wobbly. They’ll finish setting up as they cool.
Q3. Do I have to use a muffin tin?
Ans: The muffin tin is what gives them their “bite” shape and helps them cook evenly. You could try baking this in an 8×8 inch pan and cutting it into squares, but you’d need to adjust the baking time, probably adding another 10-15 minutes.
Wrapping Up
And that’s really all there is to it. You get that amazing, creamy, spicy pumpkin pie experience without all the work. It’s the perfect little treat to have in the fridge for when that fall craving hits.
They’re also pretty great for sharing. A whole pie can be a lot, but a plate of these little bites is perfect for a small get-together or just to bring to the office.
So give them a try! I really think you’ll be surprised at how simple and delicious they are. If you do make them, I’d love to hear how they turned out. Drop a comment below and let me know if you made any fun changes!