
Ok, let’s be real for a second. Sometimes you just NEED chocolate. Not just a little square of it, but a full-on, gooey, melty, scoopable chocolate experience.
You know that feeling? The one where you’re craving a campfire and s’mores but, well, you live in an apartment. Or it’s raining. Or you just don’t feel like smelling like smoke for three days.
I get it. I’ve been there. Staring into my pantry, willing marshmallows and chocolate chips to magically turn into a campfire treat.
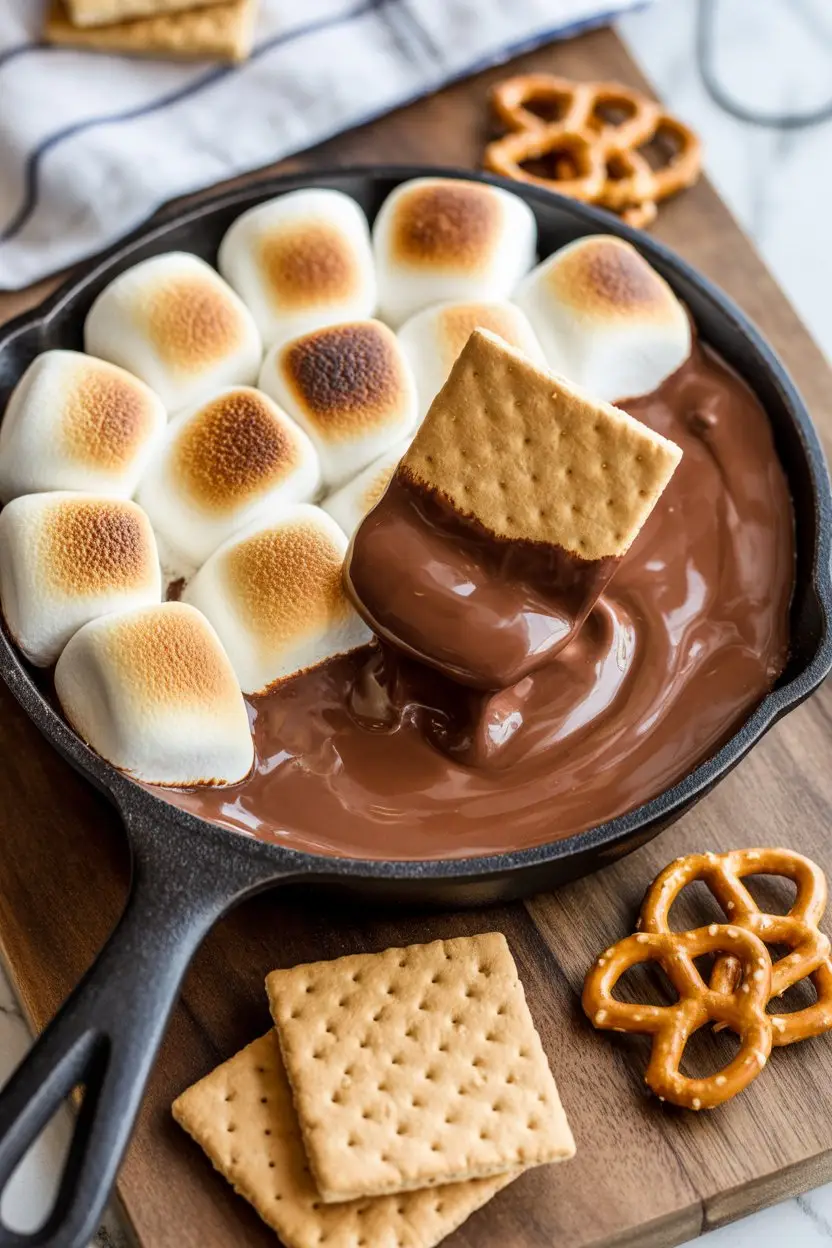
And then I discovered this. The S’mores Dip. It’s all the joy of a s’more, but in a skillet, ready in minutes. It’s a game-changer.
This isn’t some fancy, complicated dessert that requires a culinary degree. In fact, it’s so easy you’ll wonder why you haven’t been making it your whole life.
So, let’s get you that gooey, chocolatey goodness you’re craving. Because you totally deserve it.
What You’ll Need
The ingredient list is SUPER simple, which is why I love this recipe. No need for a special trip to a fancy grocery store.
- A bag of chocolate chips (about 12 ounces). Milk chocolate is classic, but we can talk about other options later.
- A bag of large marshmallows (about 10 ounces).
- A splash of milk or heavy cream (maybe a tablespoon or two). This is my secret for extra creamy chocolate.
- Things for dipping! Graham crackers are the go-to, but pretzels, apple slices, or even cookies work great. TAKE YOUR PICK.
Tools Required
You probably already have all this stuff lying around your kitchen.
- An oven-safe skillet. A 9 or 10-inch cast iron skillet is perfect because it looks cool and holds heat really well. But any oven-safe pan will do.
- An oven. Kind of important for the melty part.
- Spatula (for spreading the chocolate).
- Oven mitts! Please don’t forget these. I have. It wasn’t fun.
How to Make This Gooey Masterpiece
Alright, this is where the magic happens. Don’t blink or you might miss it.
Step 1: Preheat your oven’s broiler to high. Make sure your oven rack is in the middle position, not too close to the top. We want toasted marshmallows, not a kitchen fire.
Step 2: Pour your entire bag of chocolate chips into the skillet. Spread them out into an even layer. Now, drizzle that tablespoon or two of milk or cream over the top. It just helps everything get a little creamier.
Step 3: Arrange the large marshmallows on top of the chocolate chips. Cover the whole surface. You can get neat and tidy with rows, or just toss them in there. It all tastes the same in the end.
Step 4: Carefully place the skillet in the oven. NOW, THIS IS IMPORTANT. Do not walk away. I repeat, DO NOT WALK AWAY. Those marshmallows will go from perfectly golden to a black, smoky mess in seconds.
Step 5: Watch it like a hawk for about 2-3 minutes. Once the tops of the marshmallows are golden brown and toasty, use your oven mitts to carefully pull the skillet out.
Step 6: Let it sit for a couple of minutes because that pan and the chocolate are basically lava right now. Then, grab your dippers and go to town.
Pro Tips From My Kitchen
I’ve made this dip more times than I can count, and I’ve learned a few things. Mostly by messing up.
- Mix Your Chips: Don’t just stick to milk chocolate. I love doing half milk chocolate chips and half semi-sweet. It cuts the sweetness just a bit and gives it a richer flavor.
- Don’t Fear the Torch: If you have a little kitchen torch (for crème brûlée and stuff), you can use that to toast the marshmallows instead of the broiler. It gives you WAY more control and it’s honestly kind of fun.
- The Cream is Key: Seriously, don’t skip the splash of milk or cream. Without it, the chocolate can sometimes get a little too thick and hard to scoop once it starts to cool down. The cream keeps it dippable for longer.
- Layer in a Surprise: Before you put the marshmallows on, try dropping a few dollops of peanut butter or some chopped Reese’s Peanut Butter Cups on top of the chocolate chips. It’s a game-changer.
Substitutions and Variations
This recipe is basically a blank canvas for your dessert dreams. It’s hard to mess up, so feel free to experiment.
What if you don’t have something? Or just want to try something new? I got you.
| Instead of… | Try this… |
|---|---|
| Milk Chocolate Chips | Dark chocolate, peanut butter chips, or a mix! |
| Large Marshmallows | Mini marshmallows work too. |
| Graham Crackers | Pretzel crisps, apple slices, strawberries, shortbread cookies. |
| Plain Dip | Swirl in caramel sauce or Nutella before adding marshmallows. |
Make-Ahead Tips
Honestly, this recipe is so fast that you don’t really need to make it ahead. It’s best served hot and fresh from the oven.
But, if you’re trying to prep for a party, you can get everything ready. Just pour the chocolate chips into the skillet and put the marshmallows on top. Then cover it with foil and leave it on the counter. When you’re ready for dessert, just pop it in the oven.
Nutrition, Swaps, and More Fun Stuff
Ok, let’s be honest, we’re not eating this for our health. This is soul food. But it’s good to know what you’re working with.
A Totally Unofficial Nutritional Glance
This is a rough estimate. Don’t come after me. It’s chocolate and marshmallows, it’s going to have sugar and calories. And it’s going to be delicious.
| Nutrient | Amount (Roughly) |
|---|---|
| Joy Level | Extremely High |
| Calories | A fair amount |
| Sugar | Yes. |
Dietary Swaps
Want to make this fit a specific diet? It’s surprisingly easy.
| For a… | Use these… |
|---|---|
| Gluten-Free Version | Serve with gluten-free graham crackers, fruit, or GF pretzels. The dip itself is usually gluten-free! |
| Dairy-Free Version | Use dairy-free chocolate chips (there are some great ones out there) and a splash of coconut cream or almond milk. |
What to Serve This With
This dip is the star of the show. It’s perfect for a movie night, a casual get-together with friends, or a dessert after a simple meal like burgers or pizza.
Honestly, you don’t need an excuse. “It’s Tuesday” is a good enough reason for me.
Cooking Time Tips
The whole thing takes less than 10 minutes from start to finish. The biggest tip for efficiency? Get all your dippers ready and on a plate while the oven is preheating. That way, the second it comes out of the oven, you’re ready to dive in.
Leftovers and Storage
If you have leftovers, first of all, I’m impressed by your self-control.
Just let the skillet cool down completely. Then, you can cover it with plastic wrap or foil and stick it in the fridge for a couple of days.
To reheat, you can either pop it in the microwave for 30-second bursts until it’s melty again, or put it back in a 350°F oven for about 5-10 minutes.
Frequently Asked Questions
You’ve got questions, I’ve got answers.
Q1. My chocolate got really thick and hard, what happened?
Ans: This can happen if it gets too hot or if you skip the cream/milk. The little bit of liquid helps keep it smooth. Also, some cheaper chocolate chips have stabilizers that can make them seize up. Using a good quality brand like Ghirardelli or Guittard can make a difference.
Q2. Can I make this in the microwave?
Ans: You can melt the chocolate in the microwave, sure. But you won’t get that classic toasty, golden-brown marshmallow top. The broiler is really what makes this recipe special. So, you can, but I don’t really recommend it.
Q3. What’s the absolute best thing to dip in it?
Ans: Oh, this is the big debate. For me, it’s a tie between salty pretzel crisps (that sweet and salty combo is just unbeatable) and classic graham crackers. But a close third is a crisp apple slice. It feels… healthier. It’s not, but it feels like it is.
Q4. Can I use a different kind of pan?
Ans: Absolutely! Any oven-safe dish will work. A small glass baking dish or a ceramic pie plate are great alternatives if you don’t have a cast-iron skillet.
Wrapping Up
So there you have it. A dessert that’s ridiculously easy, takes almost no time, and delivers some serious comfort and joy. It’s proof that you don’t need a lot of fuss to make something truly amazing.
It’s one of those recipes you’ll make once and then find yourself making all the time.
Now go on, get in the kitchen and make it! I promise you won’t regret it.
And when you do, come back and leave a comment. Tell me what you thought, if you tried any crazy variations, or what your favorite dipper was. I’d love to hear about it!