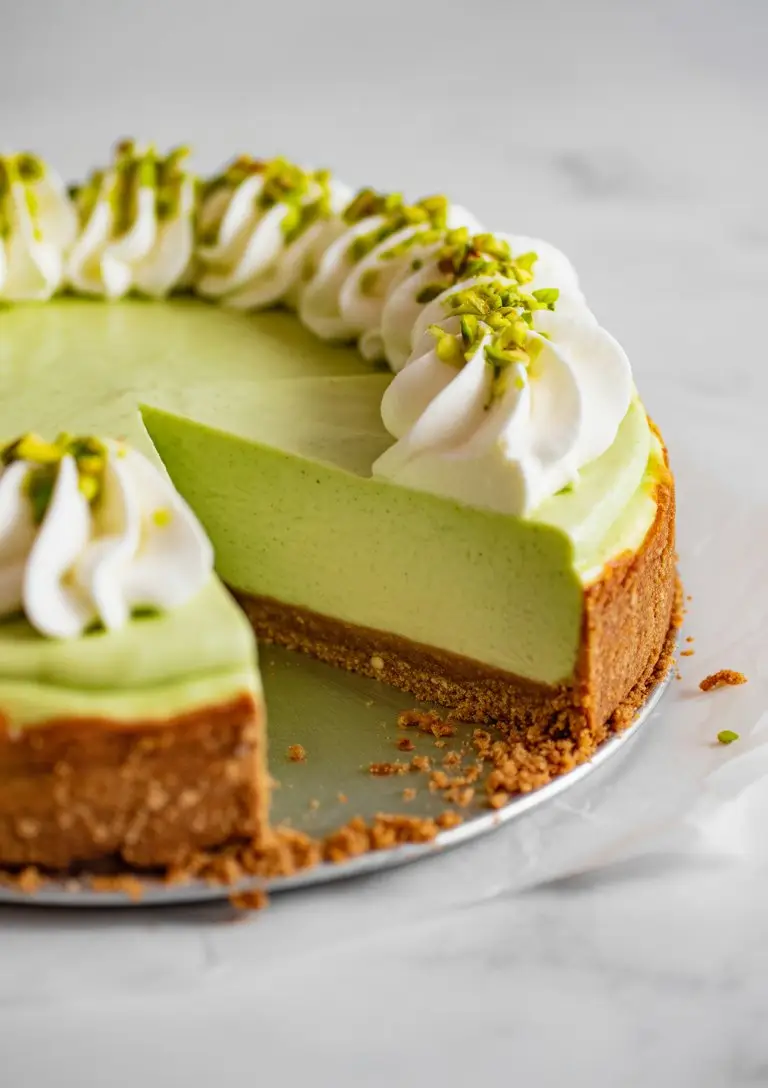
This Pistachio Cheesecake Recipe Will Ruin All Other Cheesecakes For You
I used to think pistachio was just that weird, green ice cream flavor that my parents liked. I was a chocolate-or-vanilla kid, plain and simple.
Then, one time, at a ridiculously fancy dinner I definitely couldn’t afford, they brought out this slice of pistachio cheesecake. I almost said no.
SO glad I didn’t.
It was creamy, it was nutty, and it had this rich, almost savory flavor that wasn’t overly sweet. It completely changed my mind. I spent the next week trying to figure out how to make it myself.
After a lot of… let’s call them “learning experiences,” I finally nailed it. This isn’t just a dessert; it’s an event. It’s the kind of thing you make when you want to seriously impress someone, or just treat yourself because you’re awesome.
And now I’m sharing the secret with you. Because you deserve to have your mind blown by a cheesecake.
What You’ll Need
Here’s the shopping list. Don’t let it scare you; it all comes together beautifully, I promise.
For the Graham Cracker Crust:
- 1 1/2 cups graham cracker crumbs (about 10 full sheets)
- 1/4 cup granulated sugar
- 6 tablespoons unsalted butter, melted
For the Pistachio Filling:
- 1 cup raw, unsalted, shelled pistachios
- 1/4 cup heavy cream
- 32 ounces (four 8-ounce blocks) full-fat cream cheese, at room temperature
- 1 1/2 cups granulated sugar
- 4 large eggs, at room temperature
- 1 teaspoon vanilla extract
- 1/4 teaspoon almond extract (this is a secret weapon!)
- A pinch of salt
For the Topping (Optional, but Recommended):
- 1 cup heavy cream
- 2 tablespoons powdered sugar
- 1/4 cup chopped pistachios for garnish
Pro Tips
I made all the mistakes so you don’t have to. Pay attention to these, and you’ll look like a pro.
1. Room Temperature is NOT a Suggestion.
Seriously. If your cream cheese is cold, you will get lumps. If your eggs are cold, they won’t mix in smoothly. Leave it all on the counter for at least 2-3 hours before you even THINK about starting. It’s the difference between a silky-smooth cheesecake and a lumpy, sad one.
2. The “Cheesecake Spa Day” (aka Water Bath).
A water bath sounds complicated, but it’s not. It’s just setting your pan in a larger pan with hot water. This creates steam in the oven, which makes the cheesecake cook gently and evenly. It’s the number one defense against those dreaded cracks on top. Your cheesecake needs a spa day to stay moist and beautiful.
3. Don’t Overmix the Eggs!
When you add the eggs, mix them in on low speed just until the yellow disappears. If you whip a bunch of air into the batter at this stage, the cheesecake will puff up in the oven and then collapse and crack as it cools. Gentle does it.
4. Let It Cool. No, REALLY Let It Cool.
The hardest part is the waiting. Once it’s done baking, turn the oven off, crack the door open, and let the cheesecake cool in the oven for an hour. Then, cool it on the counter. Then, cool it in the fridge for at least 6 hours, but overnight is best. This slow cooling process also helps prevent cracks and gives it that perfect, dense texture.
Tools Required
Having the right gear makes this a whole lot easier.
| Tool | Why You Need It |
|---|---|
| 9-inch springform pan | To get the cheesecake out alive. |
| Food processor or blender | For making fine pistachio paste. |
| Stand mixer or hand mixer | To get that filling super smooth. |
| Large roasting pan | For the water bath. |
| Heavy-duty aluminum foil | To wrap the pan and keep water out. |
Substitutions and Variations
Want to mix it up? Here are a few ideas.
- Crust Swap: Don’t like graham crackers? Use Biscoff cookies, vanilla wafers, or even shortbread cookies for a buttery base. Just crush ’em up to the same measurement.
- Go Nuts: If you want an even deeper pistachio flavor, look for “pistachio paste” online or in specialty stores. You can replace half of the ground pistachios with it.
- A Hint of Citrus: Add a teaspoon of lemon zest to the filling. It brightens up the flavor in a really surprising way and cuts through the richness.
- White Chocolate Drizzle: Melt some good quality white chocolate and drizzle it over the top before serving. It looks fancy and tastes amazing with the pistachio.
Make-Ahead Tips
This is the perfect make-ahead dessert. Actually, it’s BETTER when you make it ahead.
You can bake the entire cheesecake 1 to 2 days before you plan to serve it. Just keep it covered in the refrigerator. Wait to add the whipped cream topping and chopped pistachios until right before you serve it so they stay fresh.
How to Make Pistachio Cheesecake: Step-by-Step
Alright, let’s do this. Take a deep breath. It’s just mixing and baking.
Step 1: Prep Your Space
Preheat your oven to 350°F (175°C). Wrap the outside of your 9-inch springform pan with two layers of heavy-duty aluminum foil. Make sure it’s watertight! Set it aside.
Step 2: Make the Crust
In a medium bowl, mix your graham cracker crumbs and sugar. Pour in the melted butter and mix it all up until it feels like wet sand. Press this mixture firmly and evenly into the bottom of your prepared springform pan. Bake it for 10 minutes, then let it cool on a wire rack.
Step 3: Make the Pistachio Magic
While the crust cools, put the 1 cup of pistachios and the 1/4 cup of heavy cream into a food processor or a powerful blender. Blend until it forms a smooth, thick paste. You might need to scrape down the sides a few times. This is where the real flavor comes from!
Step 4: Create the Filling
In a large bowl with a stand mixer or hand mixer, beat the room-temperature cream cheese on medium speed until it’s completely smooth and creamy. No lumps! Scrape down the bowl, add the 1 1/2 cups of sugar, and beat until smooth again.
Step 5: Combine Everything
Beat in the pistachio paste you just made. Then add the vanilla extract, almond extract, and salt. Mix on low until it’s all combined. Now, add the room-temperature eggs one at a time, mixing on low speed just until each egg disappears into the batter. Remember the pro tip: do NOT overmix here!
Step 6: Assemble and Bake
Pour the gorgeous green filling over your cooled crust and spread it evenly. Place the springform pan inside your large roasting pan. Put it in the oven and carefully pour hot water into the roasting pan until it comes about halfway up the sides of your cheesecake pan. Bake for 60-70 minutes. The edges should be set, but the center should still have a slight wobble, like Jell-O.
Step 7: The Cooling Process
Turn the oven off. Prop the oven door open with a wooden spoon and leave the cheesecake inside for 1 hour. Then, take it out of the water bath and let it cool completely on a wire rack. Once it’s at room temperature, cover it loosely with plastic wrap and put it in the fridge for at least 6 hours, or preferably overnight.
Step 8: Garnish and Serve
Right before serving, you can make the whipped topping. Beat the heavy cream and powdered sugar until stiff peaks form. Spread it over the cheesecake or pipe it on, then sprinkle with those extra chopped pistachios. Slice and get ready for the compliments.
Helpful Information
Here’s a little extra info to help you out.
Nutritional Breakdown (Estimated)
This is a rich dessert, so this is just an estimate per slice (if you cut it into 12 servings).
| Nutrient | Approx. Amount |
|---|---|
| Calories | 550 kcal |
| Fat | 40g |
| Carbs | 38g |
| Protein | 10g |
Meal Pairing Suggestions
This cheesecake is rich, so it’s best after a lighter meal. Think grilled chicken salad, a simple pasta with marinara, or a light fish dish.
For drinks, a strong cup of black coffee or an espresso is perfect. If you’re feeling fancy, a sweet dessert wine like a Sauternes or a Late Harvest Riesling would be incredible.
Cooking Time Efficiency
While the crust is baking for those 10 minutes, start making your pistachio paste. While the cheesecake is doing its 1-hour cool-down in the oven, you can wash all the prep bowls. Work smarter, not harder!
Leftovers and Storage
If you somehow have leftovers, cover the cheesecake tightly with plastic wrap or store it in an airtight container in the fridge. It will stay delicious for up to 4 days.
You can also freeze it! Place individual slices on a baking sheet and freeze until solid. Then, wrap each slice in plastic wrap and then foil. It’ll keep in the freezer for about a month. Just thaw it in the fridge overnight before eating.
Frequently Asked Questions (FAQ)
Q1. My cheesecake cracked! What did I do wrong?
Ans: Don’t panic! It still tastes amazing. Cracks usually happen for three reasons: the ingredients were too cold, it was overmixed after adding the eggs, or it cooled too quickly. The water bath and slow cooling process are your best friends here.
Q2. Can I use pre-shelled or roasted/salted pistachios?
Ans: Yes to pre-shelled, it will save you a ton of time! Just make sure they are unsalted. If you can only find salted ones, give them a quick rinse and pat them very dry before using, and maybe reduce the pinch of salt in the recipe.
Q3. Why is my cheesecake runny?
Ans: It probably just needed more time in the oven. Ovens can be weird and temperatures vary. It should have a slight wobble in the very center (about 2-3 inches wide) but the rest should be set. The long chill time in the fridge is also essential for it to fully set up.
Q4. Do I absolutely HAVE to use a water bath?
Ans: Look, I’m not gonna come to your house and check. But I HIGHLY recommend it. It’s the best way to get a creamy, crack-free cheesecake. If you absolutely can’t, place a pan of hot water on the rack below the cheesecake to get some steam in the oven. It’s better than nothing.
Q5. I don’t have a springform pan. Am I out of luck?
Ans: You can make it in a 9-inch deep-dish pie plate or a 9-inch square baking pan. You just won’t be able to get those clean, perfect slices since you’ll have to scoop it out. It will taste just as good, though!
Wrapping Up
So there you have it. The recipe for a cheesecake that will make your friends and family think you’re a baking genius. It takes a little patience, but the result is so, so worth it.
That first bite of creamy, nutty, perfectly balanced cheesecake is a moment of pure bliss.
Go on, give it a try! And when you do, come back and leave a comment. I’d love to hear how it went, and if you have any questions, just ask!


Leave a Reply