
Okay. Let’s make something that feels indulgent, tastes ridiculously good, and still makes you feel like you’re back on track. Like you’re doing something kind for your body, without punishing yourself.
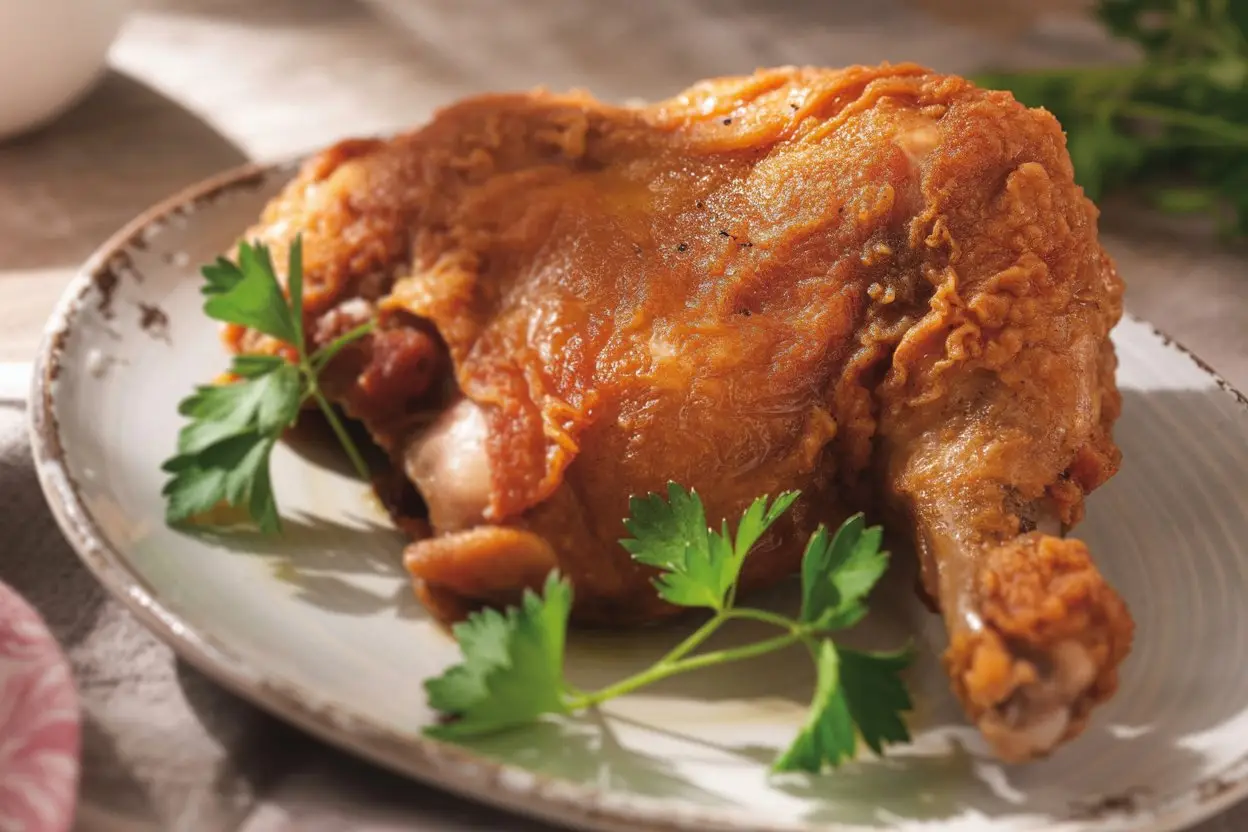
Today, we’re making oven-fried chicken. And not just any oven-fried chicken. I’m talking about EXTRA crispy, golden, crackly-on-the-outside, juicy-on-the-inside kinda chicken that gives fried chicken energy—without you needing a deep fryer or a gallon of oil.
It’s the kind of chicken that makes you go, “Wait… I made this??”
Yep. You did. And I’m here to help you do it like a pro.
Let’s go.
What You’ll Need
Before we get started, here’s a quick rundown of what you’ll need. And don’t worry, no fancy ingredients or anything complicated.
- Chicken pieces (drumsticks, thighs, wings—whatever you like)
- Buttermilk (for that tender, juicy inside)
- Self-rising flour (trust me on this one)
- Salt
- Black pepper
- Garlic powder
- Onion powder
- Paprika (smoked if you like a little more depth)
- Poultry seasoning
- Cooking spray (like avocado or canola oil spray)
That’s it. You probably already have most of this in your kitchen.
How This All Comes Together (Without the Oil Bath)
Alright, so you’re not deep frying. But you still want that same shatteringly crisp crust, right?
Here’s the deal: The magic happens in the coating + the oven setup. Self-rising flour gives the coating a light, crackly texture (way more than regular flour), and the hot oven with a wire rack keeps the air moving around the chicken so it crisps up evenly without sitting in its own sogginess.
The result? Chicken that tastes fried, feels fried, and satisfies every fried chicken craving you’ve got… all while baking away in your oven.
Sound good? Let’s do this.
Step-by-Step Instructions
1. Let the chicken hang out in buttermilk
This step is pretty chill. Add your chicken pieces to a big bowl or zip-top bag and pour in enough buttermilk to coat everything. Let it marinate for at least 4 hours, but overnight is where the real magic happens.
Buttermilk isn’t just for flavor. It breaks down the proteins just enough to make your chicken melt-in-your-mouth tender. No chewy weirdness. Just juicy, well-seasoned goodness.
2. Mix up your flour coating
In another bowl, mix your self-rising flour with salt, pepper, garlic powder, onion powder, paprika, and poultry seasoning. If you want a little heat, throw in some cayenne or chili powder. Go with your gut here.
What you’re looking for is a flour mix that’s flavorful on its own. If it tastes bland, your chicken will too. Don’t be afraid to season like you mean it.
3. Coat the chicken
Take the chicken out of the buttermilk (let the excess drip off) and press it into the seasoned flour. Press each piece firmly so that flour really sticks.
Double coating? You can totally do that if you want an even thicker crust. Just dip the flour-coated piece back into the buttermilk and then dredge it in the flour mixture again. Boom. Extra crunch.
4. Line your baking sheet like a pro
Grab a baking sheet and line it with foil. Place a wire rack on top if you have one. This allows the hot air to circulate under the chicken, giving you that crispiness on all sides.
Don’t have a wire rack? No problem. You can still bake the chicken directly on the foil, just flip it halfway through so both sides get crispy.
Lightly spray your rack with oil so the chicken doesn’t stick.
5. Add the chicken, spray with oil, and bake
Place your coated chicken pieces on the rack and give them a good spray with cooking oil. This is important. It helps the flour crisp up instead of drying out or staying powdery.
Bake at 400°F for 35–45 minutes, depending on your chicken size. You want a deep golden brown crust and an internal temp of 165°F. If you’re unsure, grab a meat thermometer and check.
If some pieces are browning too fast, cover them loosely with foil and keep baking until they’re done.
Let them rest for a few minutes before you dig in. It helps the juices redistribute and keeps everything tender.

Pro Tips You’ll Be Glad You Knew
- Don’t skip the buttermilk. Seriously. It’s not just there to sound fancy. It’s what makes the chicken super juicy and flavorful. If you don’t have it, see below for a quick substitute.
- Use a wire rack. This might be the one tool that makes all the difference. The air circulation = crispy magic.
- Season your flour well. If your flour mix is boring, your chicken will be too. You want it to taste amazing before it even goes in the oven.
- Spray GENEROUSLY with oil. This is your crisp cheat code. Dry flour doesn’t crisp. Oil helps the outer coating bubble and brown in the oven.
- Check the internal temp. Don’t just go by the color. Some pieces cook faster than others, so it’s always good to double-check that 165°F temp to keep things safe (and juicy).
Tools You’ll Need
- Large bowl for marinating
- Zip-top bag (optional, for easier cleanup)
- Mixing bowl for flour
- Baking sheet
- Wire rack (helps a lot but not required)
- Cooking spray
- Tongs
- Meat thermometer (trust me, it’s worth it)
Substitutions & Variations
- No buttermilk? Just mix 1 cup milk with 1 tbsp lemon juice or vinegar. Let it sit for 5 minutes and boom—DIY buttermilk.
- Want to go spicy? Add cayenne, hot sauce, or even a little chili paste to your buttermilk marinade.
- Different cuts of chicken? Totally fine. Just adjust cooking times. Boneless cooks faster, bone-in stays juicier.
- Low-carb version? Swap flour for almond flour or a keto-friendly baking mix. It won’t be quite the same but it’ll still crisp up with oil spray.
Make-Ahead Tips
- Marinate your chicken the night before so it’s ready to go when you are.
- You can also flour-coat your chicken and place it on a tray in the fridge for up to 4 hours before baking. This helps the coating stick even better and gives you a crispier finish.
What to Serve it With
- Mashed potatoes and green beans (classic combo)
- Corn on the cob and coleslaw
- A light arugula salad if you’re feeling fancy
- Or just eat it straight from the tray while watching your favorite show. No judgment here.
Leftovers & Storage
If you have leftovers (big “if”), here’s what to do:
- Store in an airtight container in the fridge for up to 3 days.
- Reheat in the oven at 350°F for 10–15 minutes to get that crisp back.
- Want to freeze? Go for it. Wrap tightly and freeze up to 2 months. Reheat in the oven until hot and crispy.
Pro tip: don’t microwave this. It’ll go from crispy to chewy in seconds.
FAQ
Q: Can I use boneless chicken? Yes! Just adjust the cooking time. Boneless pieces cook faster, so check for doneness at the 25–30 minute mark.
Q: Can I use all-purpose flour? You can, but self-rising flour gives a better crust. If using all-purpose, add 1 ½ tsp baking powder and ¼ tsp salt per cup of flour.
Q: What’s the best way to make this gluten-free? Use a gluten-free flour blend with baking powder added. Just know it may not be quite as crispy.
Q: Do I have to use a wire rack? Nope. It helps, but you can still get a great result by flipping the chicken halfway through baking.
Wrap Up
So there you have it—crispy, golden, oven-baked chicken that tastes like it came out of a fryer but didn’t. It’s everything you crave when you want something indulgent and easy.
This recipe is comfort food without the regret. Crunchy without the hassle. And honestly? Pretty life-changing.
If you make this (and I really hope you do), let me know how it turned out. Leave a comment, ask your questions, or tell me how many pieces you “accidentally” ate standing at the counter. I’ll be over here pretending I didn’t do the same thing.
You’ve got this. Chicken victory is just a preheated oven away.