
So…you saw the yellow squash at the store. It was shiny. It looked cheerful. Maybe it whispered “healthy” to you. And in a moment of bold, veggie-loving inspiration, you tossed it in your cart.
And then it sat.
And sat.
And slowly turned into the veggie version of a guilt trip in your fridge.
We’ve all been there. No shame. But today? Oh today is your day of redemption. We’re gonna do something with that squash. Something ridiculously easy. Something crispy. Something cheesy. Something you’ll actually want to eat again.
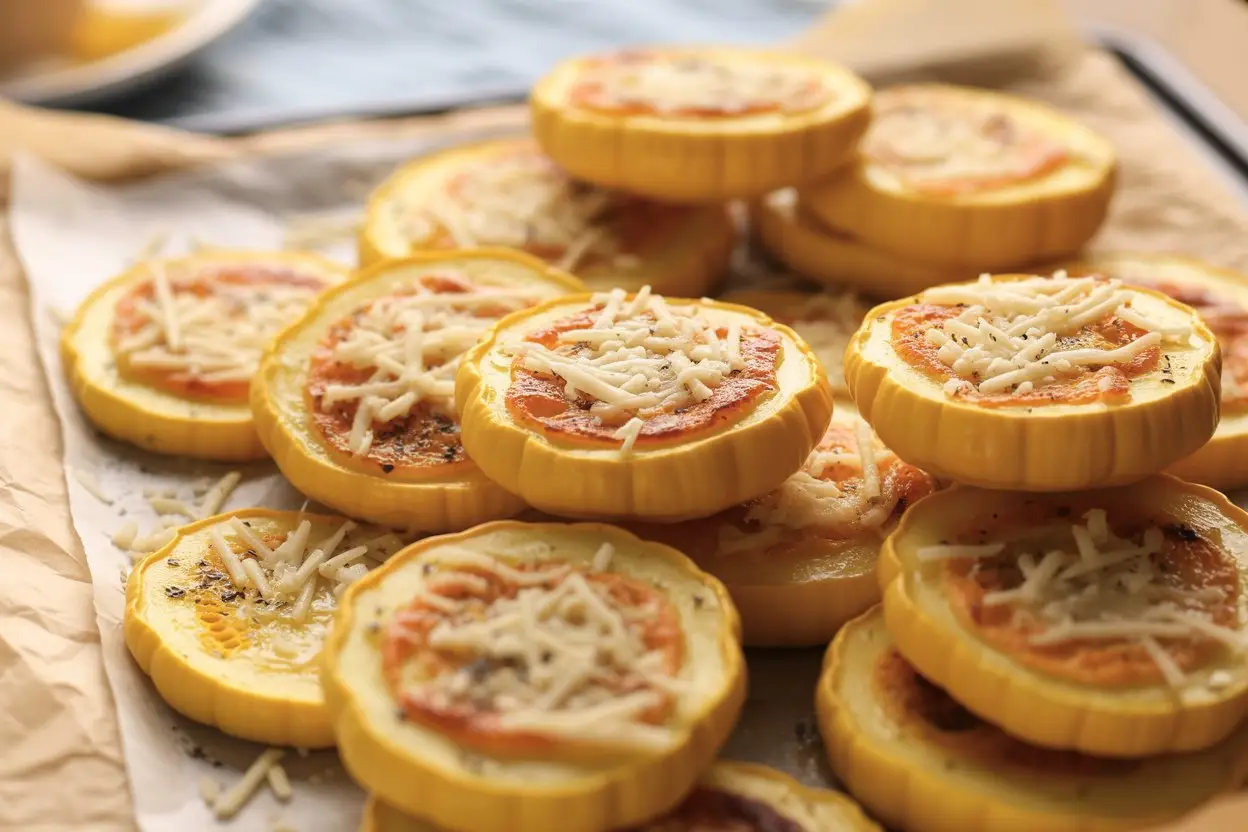
These Baked Parmesan Yellow Summer Squash Rounds are basically the snack you never knew you needed until now. They’re crispy on the outside, tender on the inside, and somehow taste like you actually know what you’re doing in the kitchen.
Let’s get into it. Because that squash isn’t going to bake itself.
What You’ll Need
Alright, this is simple. You don’t need to climb a mountain or harvest rare seeds under a full moon. Just grab this:
- 2 medium yellow summer squash
- ½ cup of freshly grated Parmesan cheese (fresh is best, but you know… life)
- A little garlic salt, to taste
- A few cracks of black pepper, also to taste
- Optional: dried Italian herbs or a pinch of paprika if you’re feeling spicy
That’s it. No obscure ingredients, no trips to five different stores.
The Tools
You honestly don’t need a whole kitchen setup for this. Here’s what’ll get the job done:
- A sharp knife (or a mandoline if you’re fancy or prone to uneven slicing like I am)
- Cutting board
- Baking sheet
- Parchment paper or foil (something to make cleanup less tragic)
- Cheese grater (because we’re going for real cheese flavor here)
- An oven that works (or at least heats up without smoking)
Ok But… Why Should I Make These?
Because you’re probably tired of healthy snacks that taste like sadness. These taste like… triumph. They’re salty, a little crispy, super satisfying, and bonus: you get to feel like you made a “real” vegetable dish without a ton of effort.
Also, the combo of squash + Parmesan = super filling without the crash. Great for a mid-afternoon “I need something or I’ll lose it” moment.
The Instructions (Or How to Feel Like a Kitchen Boss in 7 Steps)
- Preheat that oven. 425°F. Get it nice and hot so the cheese gets crispy, not rubbery.
- Slice the squash into rounds. About ¼ inch thick. Too thin and they burn. Too thick and you’re just eating hot squash circles with some cheese on top. Go Goldilocks on it.
- Line your baking sheet. Use parchment or foil. Trust me, it’ll save you scrubbing cheese off metal later and no one wants that.
- Lay out your squash slices. Try not to overlap them. Everyone deserves their own little space to get crispy.
- Season. Sprinkle garlic salt and pepper on each slice. You’re not making bland diet food here. Flavor is your friend.
- Top with cheese. A little mound of Parmesan on each slice. No need to measure with surgical precision. Just aim for a nice light blanket.
- Bake. Pop them in for about 15 to 20 minutes. They’re done when the cheese is golden and bubbly and your kitchen smells like something delicious is happening.
Optional: If you want even more crunch, broil them for an extra minute or two at the end. Just don’t walk away. You will regret it.

Pro Tips (AKA Stuff I Wish I Knew The First Time)
1. Freshly grated Parmesan melts better and tastes better. The pre-shredded stuff is coated in weird powder that keeps it from clumping in the bag… but also keeps it from melting right. Fresh makes all the difference here.
2. Keep the slices even. If one slice is paper-thin and the other is thick as a hockey puck, guess what? One’s going to burn and one’s going to be mushy. Not cute. Go even and consistent.
3. Use a mandoline slicer if you have one. If you don’t, your knife skills are about to get a great workout. Either way, keep things uniform.
4. Don’t skimp on seasoning. This isn’t a salad. Salt is your best friend here. Garlic salt + black pepper = flavor magic.
5. Eat them hot. This isn’t a dish that gets better as it sits. These rounds are best straight out of the oven when the edges are still crispy and the cheese is golden. Wait too long and you’ve got soft squash circles with slightly soggy cheese hats. Not quite the same.
Substitutions & Variations (Because You Do You)
- No yellow squash? Use zucchini. It’s practically squash’s twin.
- Want to mix up the cheese? Try shredded mozzarella or cheddar. Or a combo.
- Add breadcrumbs. If you want extra crunch, sprinkle some panko mixed with olive oil on top.
- Feeling spicy? A pinch of cayenne or red pepper flakes does wonders.
- Vegan version? Use a plant-based Parmesan alternative. Or go for nutritional yeast and add a sprinkle of olive oil on top for better browning.
Can I Make These Ahead?
Kind of.
They’re best right after baking, but you can definitely do some prep:
- Slice your squash in the morning or the night before.
- Grate your cheese and keep it in a little container in the fridge.
- When ready, just assemble and bake.
Not a full meal prep situation, but enough to save you time when the hanger hits.
Nutrition Deets (Just in Case You’re Curious)
Per serving (rough estimate based on 2 medium squash and ½ cup Parmesan):
- Calories: ~130
- Protein: 6–7g
- Fat: 7g
- Carbs: 6–8g
- Fiber: 2g
- Sodium: Depends on your garlic salt situation
If you’re watching sodium, just go light on the garlic salt and use herbs for extra flavor.
Keto? Yep. Low carb? You’re in. Gluten-free? Naturally.
Meal Pairing Ideas
Want to turn this into a full meal? Try:
- Roasted chicken thighs + a big salad + these squash rounds
- Grilled fish + lemon rice + squash rounds
- Pasta night! Use these as your veggie side to balance the carb love
They also work as a party appetizer, late-night snack, or a “I’m bored but don’t want chips” kind of treat.
Storing Leftovers (If You Even Have Any)
If you somehow have extras:
- Store them in an airtight container in the fridge for up to 3 days.
- Reheat in a toaster oven or regular oven at 350°F until warmed through. Avoid the microwave unless you’re okay with soft and sad squash.
- Don’t freeze. The texture won’t survive it. Trust me on this one.
FAQ (Because Someone’s Gonna Ask)
Can I use zucchini instead of yellow squash? Yes, absolutely. Works exactly the same.
What if I don’t have garlic salt? Just use regular salt and a sprinkle of garlic powder. Close enough.
Do I need to flip the slices halfway through? Nope. The cheese kind of melts and crisps on top while the squash cooks underneath. Leave them be.
Can I air fry these? Totally. 400°F for about 8 to 10 minutes. Just don’t crowd the basket.
Can I make these dairy-free? Yup. Use your favorite vegan cheese or nutritional yeast. Just don’t expect the same crisp factor.
Wrap Up
You made it to the end, which means one of two things:
- You’re totally making these.
- You’re just here for the vibes and maybe a snack idea later.
Either way, you now have a recipe that turns a forgotten vegetable into a craveable dish. One that’s fast, flavorful, and makes you feel like a total kitchen champ.
And hey, if you try it, let me know how it goes. Did you add your own twist? Swap the cheese? Use a different veggie altogether? I’d love to hear it.