
Ok, real quick before we get into the juicy, crunchy details… can we just agree that fried chicken is one of those things that hits different?
Like, seriously. You could have had a completely off day—maybe your to-do list laughed in your face, your inbox is a nightmare, or someone brought up cardio. And somehow, a golden, crispy bite of perfectly seasoned fried chicken just makes things… better.
And no, I’m not saying food is therapy. But also, I’m kind of saying that food is therapy.
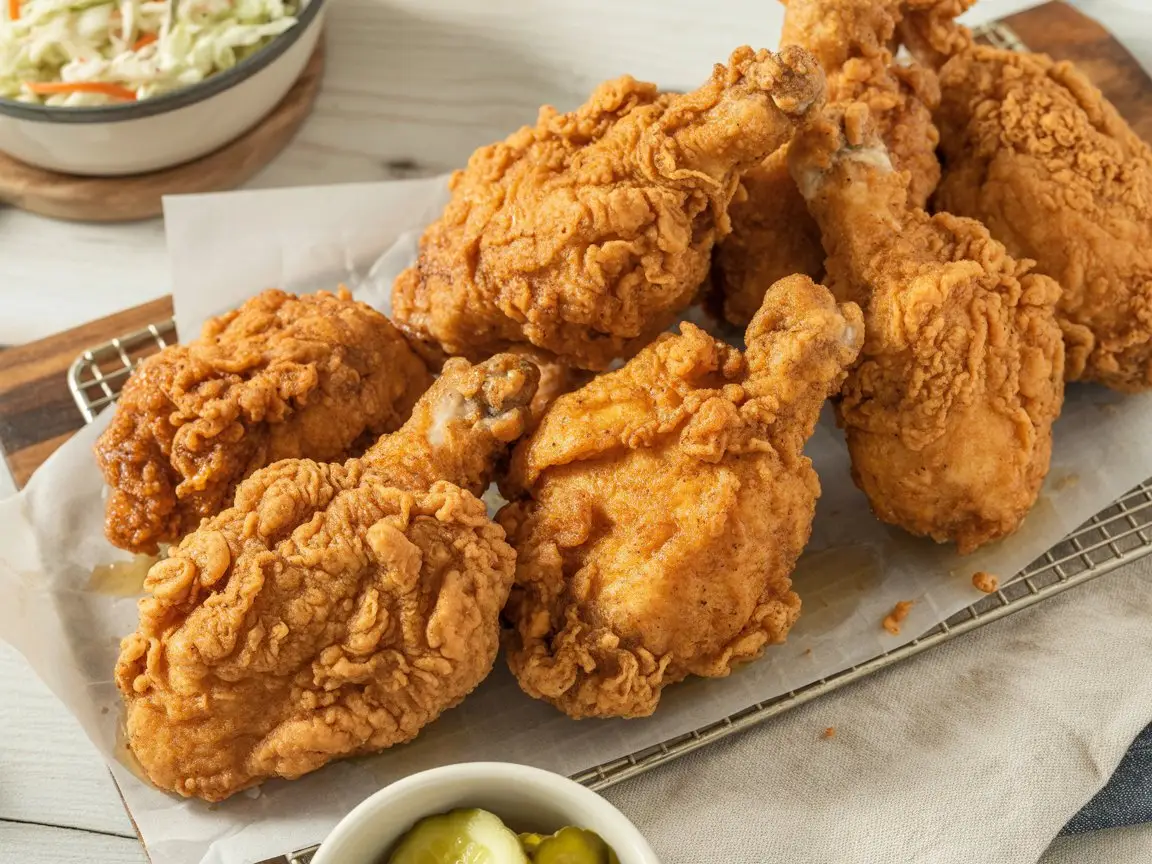
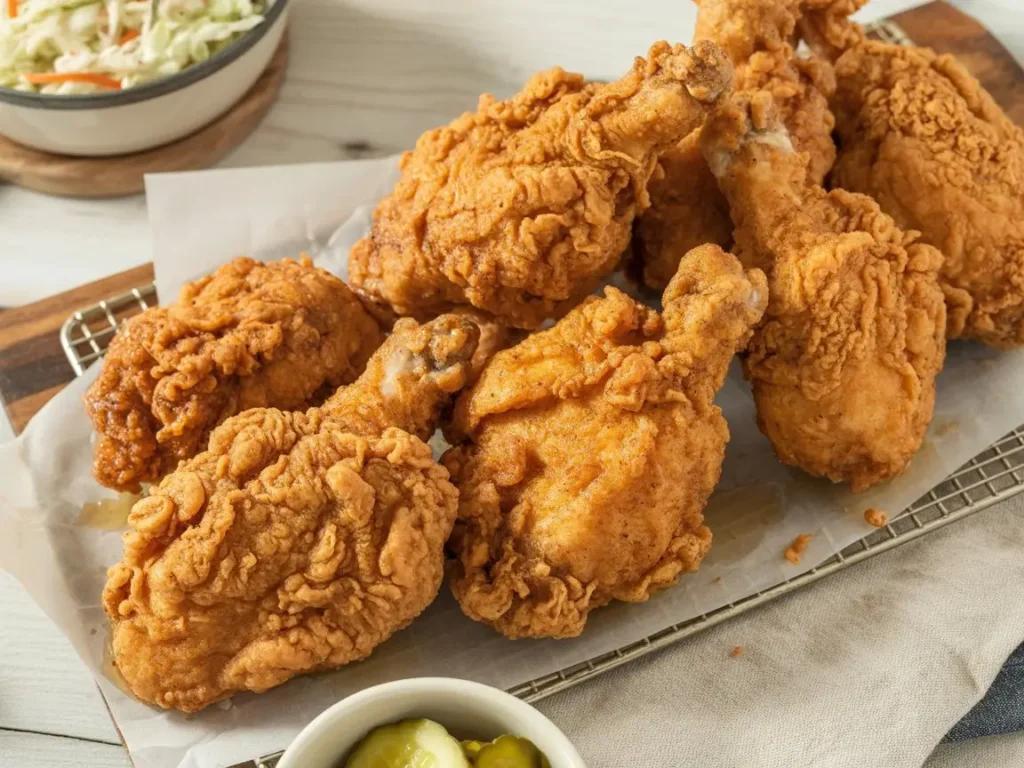
Especially this one. Because this isn’t just any fried chicken recipe. This is Southern-style buttermilk fried chicken that gets you those shatteringly crisp edges, juicy meat inside, and that real “did I just eat five pieces without realizing?” type of experience.
So whether you’re cooking to impress, to feel better, or just because your soul whispered “you need fried chicken”, this is the one.
Let’s make it together.
What You’ll Need
Alright, let’s keep it simple. You don’t need fancy stuff here—just some basics that turn into magic when combined the right way.
For the marinade:
- 2 cups buttermilk
- 1 tablespoon Dijon mustard
- 1 teaspoon salt
- 1 teaspoon black pepper
- 1 teaspoon cayenne pepper
- 3 lbs of chicken pieces (legs, thighs, breasts, or just go all in with a whole cut-up chicken)
For the coating:
- 2 cups all-purpose flour
- 1 tablespoon baking powder
- 1 tablespoon garlic powder
- 1 tablespoon onion powder
- 1 teaspoon paprika
- Salt and pepper to taste
For frying:
- Enough vegetable oil to submerge the chicken pieces (about 5 cups for a big skillet)
Tools That’ll Help (but don’t panic if you don’t have every single thing)
- A large bowl for marinating
- Resealable bag or dish to soak the chicken
- A heavy-bottomed skillet or Dutch oven
- Wire rack + baking sheet (super helpful for draining)
- Tongs or a slotted spoon
- Thermometer (nice to have, not essential)
Step-by-Step Instructions
1. Marinate That Chicken
First off, grab your bowl and mix together the buttermilk, mustard, salt, black pepper, and cayenne. Add your chicken and fully submerge it.
Now pause.
This is where the magic starts. That buttermilk? It’s not just for show. It helps tenderize the chicken, keep it juicy, and gives the coating something to cling to later.
Cover it and pop it in the fridge. Minimum 2 hours. Maximum? Overnight. And yes, longer is better here.
2. Mix Your Coating
Right before you’re ready to fry, mix up the flour, baking powder, garlic powder, onion powder, paprika, and a pinch of salt and pepper in a shallow bowl.
This is your crispy, flavor-packed armor. And it’s what’s going to give you that loud crunch that turns heads at the dinner table.
3. Coat the Chicken
Take the chicken out of the marinade and let the extra drip off. Dredge it in your flour mix—pressing each piece firmly into the coating like you mean it.
Now pause again.
Let those floured pieces sit on a rack (or a plate) for 10–15 minutes. This gives the coating time to “stick” and avoids it falling apart in the oil.
Want extra crispy? Double dip. After the first flour coat, dunk it back in the buttermilk, then coat it again in flour. It’s a game changer.
4. Heat the Oil
Pour your oil into a deep skillet or Dutch oven. Heat it to 350°F (medium-high). If you don’t have a thermometer, dip the tip of a wooden spoon in the oil—if it bubbles steadily, it’s ready.
Too hot and it’ll burn before the inside is done. Too cool and it’ll be greasy. So aim for that sweet spot.
5. Fry Like a Pro
Working in batches, add the chicken skin-side down. Don’t overcrowd the pan—it’ll drop the temp and mess with your crisp.
Fry each piece 12–15 minutes, turning halfway through, until golden and gorgeous. Larger pieces like thighs and breasts might need closer to 18–20 minutes.
Transfer to a wire rack set over a baking sheet. Let it rest for 5–10 minutes. This keeps the bottom from getting soggy and gives the juices time to settle.
Substitutions & Variations
Because let’s be real, sometimes you just don’t have that one thing in the pantry.
- No buttermilk? Use 2 cups of milk mixed with 2 tablespoons lemon juice or white vinegar. Let it sit for 10 minutes. Boom—instant buttermilk.
- Low heat tolerance? Skip the cayenne or replace it with smoked paprika.
- No Dijon? Use regular yellow mustard or even a bit of hot sauce for kick.
- Going gluten-free? Swap the flour for your favorite GF blend.
- Different meat? This works great with boneless thighs, tenders, or even wings. Adjust your fry time down for smaller cuts.
Pro Tips (Trust Me on These)
1. Let it rest. After coating, don’t rush it. Letting the chicken sit before frying makes a world of difference in the crunch department.
2. Use a rack. Draining on paper towels? Sure. But a wire rack keeps the bottom crisp and lets excess oil drip away evenly.
3. Don’t fiddle. Once the chicken’s in the oil, leave it be. Too much turning can knock off the coating.
4. Keep the oil clean. Use a slotted spoon to fish out bits between batches. Burned crumbs ruin everything.
5. Salt right after. When it’s still hot, hit it with a light sprinkle of salt. It sticks better and adds that last punch of flavor.
Can I Make It Ahead?
Yes and no.
The best version of this is hot out of the oil. That said, here’s what you can do ahead:
- Marinate the chicken up to 24 hours in advance.
- Mix the flour coating and store it in an airtight container.
- Fry it up, then keep it warm in a 250°F oven on a wire rack until ready to serve. It holds surprisingly well.
Let’s Talk Nutrition (Just For Fun)
Look, no one eats fried chicken thinking it’s kale. But knowledge is power, right?
Per average serving (1–2 pieces):
- Calories: ~480
- Protein: 28g
- Carbs: 26g
- Fat: 27g
Want to lighten it up? Use skinless chicken or go for an air fryer version. (Yes, it works. Just not as magical.)
What to Serve It With
This isn’t just a dish. It’s a whole mood. Here’s what goes great on the side:
- Creamy coleslaw
- Buttermilk biscuits (bonus points if you make your own)
- Mac and cheese
- Cornbread
- Pickles or spicy honey for contrast
- Sweet tea or lemonade to wash it down
And if you’re feeling extra, a little hot honey drizzled over the top? Wildly good.
Leftovers & Storage
You probably won’t have any, but just in case:
- Store cooled chicken in an airtight container in the fridge for up to 3 days.
- To reheat: skip the microwave. Pop it in a 375°F oven or toaster oven for 10–15 minutes. It’ll crisp back up like a dream.
- You can also freeze it—wrap tightly, then reheat from frozen in the oven at 400°F for about 20–25 minutes.
FAQ
Q: Can I air fry this? Yes, and it still turns out pretty good. Spray the coated chicken with oil and air fry at 375°F for 22–25 minutes, flipping halfway. Just don’t expect it to be quite as golden.
Q: Is this spicy? Not aggressively. It has a little warmth, but you can adjust the cayenne to your liking.
Q: Can I use boneless chicken? Definitely. Boneless thighs or breasts cook quicker and are easier to eat, but bone-in gives more flavor.
Q: How do I know it’s cooked through? Use a meat thermometer if you have one—165°F internal temp is your goal. If not, cut into the thickest part and check for clear juices and no pink.
Wrap Up
That’s it. You did it. You’re officially the kind of person who makes crispy, juicy, Southern-style buttermilk fried chicken from scratch.
And the best part? You didn’t need a deep fryer or a culinary degree. Just a little love, a little patience, and maybe a second helping because it’s that good.
Try it out, play around with the spices, and let it become your go-to comfort meal. And hey—if you do make it, I’d seriously love to hear how it turned out. Drop a comment, ask a question, or just say “I made it and wow, yes.”
Now go grab that chicken. You’ve got this.