
There’s just something about coffee that feels like a warm hug. Or a kick in the pants. Depending on the day.
Now imagine taking that bold, rich coffee flavor and turning it into a creamy, dreamy ice cream that doesn’t even need a machine. Yes, really. No eggs. No fancy churner. No chef-level experience required. Just a few ingredients, a little time, and a love for all things coffee. You in?
If your brain is currently saying, “Wait, I can make real-deal ice cream without a machine or eggs?” then congratulations, you’re about to become that person who casually drops, “Oh yeah, I just whipped up some coffee ice cream,” like it’s no big deal. (It is.)
So let’s get into it—because this is one of those ridiculously easy recipes that feels like you’ve discovered a culinary cheat code. And honestly? You kind of have.
What You’ll Need
This is one of those magical recipes where simplicity actually works in your favor. You don’t need a mile-long ingredient list. Just a few high-quality basics and you’re good.
- 300ml fresh cream (at least 25% fat works best)
- ½ can (about 200g) of sweetened condensed milk
- 2 tablespoons instant coffee powder
- 1 tablespoon hot water
- 1 teaspoon vanilla extract
- Optional: chocolate chips, crushed espresso beans, or a drizzle of chocolate syrup for mix-ins
Everything in that list plays a role. Nothing is just filler. And that’s part of what makes this recipe such a win—it’s streamlined, it’s clean, and it delivers big on flavor.
How This Works (In Plain Speak)
You’re not boiling anything. You’re not separating eggs. You’re not dragging out that ice cream machine you used one time in 2021 and then never again.
Here’s what’s really happening: when you whip cream and fold it into condensed milk, you’re creating the creamy, scoopable base that traditional churned ice cream usually gets from lots of movement and air. This method skips the movement and lets the air come from the whipped cream. It’s fast, it’s effective, and the texture is honestly amazing.
The coffee? That’s your flavor bomb. And by blooming it in hot water, you’re waking it up so it doesn’t taste flat or bitter. Think smooth, bold, slightly sweet coffee running through every bite.
Tools You’ll Want on Deck
You don’t need anything fancy, but a few basics will make your life easier:
- A mixing bowl (cold, if possible)
- Electric hand mixer or whisk (hand whisk will work but takes more effort)
- Rubber spatula (for folding)
- Freezer-safe container (a loaf pan is perfect)
- Spoon or ice cream scoop (hot water trick coming later)
That’s it. If you’ve got those, you’ve basically got an ice cream parlor in your kitchen now.
Pro Tips (a.k.a. The Stuff I Wish I Knew Sooner)
1. Chill everything. Cold cream whips better. Cold bowls help. Cold beaters? Even better. If your kitchen is hot or humid, throw your mixing tools in the fridge or freezer for 15 minutes. It makes a difference.
2. Don’t skip blooming the coffee. Mixing instant coffee with hot water before adding it to the base unlocks the full depth of flavor. If you just dump dry powder into the mix, you’ll end up with clumps and less coffee impact.
3. Fold, don’t stir. Once your cream is whipped, treat it gently. Folding keeps the air in, which means your ice cream stays soft and scoopable instead of turning into a frozen brick.
4. Add your mix-ins last. If you’re using chocolate chips or espresso beans, fold them in right before freezing. It keeps them evenly spread and avoids them sinking to the bottom.
5. Scoop like a pro. Running your scoop under warm water before digging in will help glide through even the firmest ice cream. No wrist strain, no mess.
Substitutions and Variations
This recipe is super flexible. Feel free to customize depending on what you’ve got or what your body prefers.
• Dairy-Free: Swap the cream for full-fat coconut cream and the condensed milk for sweetened condensed coconut milk. The texture will be slightly different (a little denser) but still scoopable and delish.
• Low-Sugar: Use a low-sugar or sugar-free condensed milk substitute. Just note: it may alter the freezing consistency slightly.
• Caffeine-Free: Yes, decaf instant coffee works just as well. If you love the flavor but not the late-night buzz, go decaf.
• Mocha Swirl: Mix in a tablespoon of cocoa powder when blooming your coffee. Or drizzle in chocolate syrup as you’re pouring it into the container for beautiful mocha streaks.
• Boozy Upgrade: Add a tablespoon of Kahlua or coffee liqueur. It deepens the flavor and also helps keep the ice cream softer after freezing. Win-win.
Make-Ahead Tips (Because Life is Busy)
You can absolutely make this a day—or even a couple of days—ahead. Once frozen, it keeps for about two weeks. Just make sure you cover it well (a layer of plastic wrap pressed against the surface works beautifully) to avoid ice crystals.
If you’re hosting, make it two nights before. That way it’s fully frozen and ready to impress without lifting a finger the day of.
Step-by-Step Instructions
Let’s keep this clear and stress-free. Here’s how it goes down:
1. Bloom the coffee. Mix your instant coffee with the hot water. Stir until fully dissolved. Set aside to cool slightly.
2. Combine the flavor base. In a large mixing bowl, pour in your sweetened condensed milk, the bloomed coffee, and vanilla extract. Stir until fully combined and smooth.
3. Whip the cream. Using an electric mixer, whip the cold fresh cream until it forms soft peaks. This usually takes 3–4 minutes. It should be fluffy and hold its shape, but not stiff or grainy.
4. Fold like a champ. Add the whipped cream to the coffee-condensed milk mixture in thirds, folding gently with a spatula after each addition. Go slow. Keep the air in.
5. Add extras (if using). Fold in any mix-ins like chocolate chips or espresso bits.
6. Pour and freeze. Pour the mixture into your container. Press a piece of plastic wrap directly on the surface, cover with a lid or foil, and freeze for at least 6–8 hours or overnight.
7. Scoop and serve. Let sit for 5–10 minutes at room temp before scooping. Use a warm spoon or scoop for best results.

Leftovers and Storage
Store this ice cream in an airtight container with a piece of plastic wrap pressed directly onto the surface to prevent freezer burn. It’ll stay good for about two weeks.
If it’s rock-solid straight from the freezer, let it hang out on the counter for 10–15 minutes. You’ll be rewarded with creamy perfection.
Nutritional Breakdown (Per Serving, Approximate)
- Calories: 177
- Fat: 11g
- Carbs: 18g
- Protein: 2g
- Sugars: 17g (Values will vary slightly depending on brands and mix-ins.)
For those tweaking things for dietary needs:
- Keto-Friendly: Use heavy whipping cream, unsweetened condensed milk alternative, and stevia-sweetened chocolate.
- Vegan: Coconut cream + sweetened condensed coconut milk + dairy-free chocolate chips.
Pair It With…
Honestly? You don’t need to pair this with anything. But if you want to go full dessert royalty:
- Warm brownies
- Chocolate chip cookies
- A shot of espresso (hello, affogato)
- A drizzle of salted caramel sauce
- Or just… a spoon. Standing at the freezer. We’ve all been there.
FAQ (Let’s Answer What You Might Be Thinking)
Can I use brewed coffee instead of instant? You can, but you’ll need to reduce the liquid a bit to avoid thinning out the base too much. Instant works better for flavor concentration without adding water.
What if I don’t have a mixer? You can whip cream by hand with a whisk—it’ll take longer and some elbow grease, but it works.
It tastes icy instead of creamy—what went wrong? Make sure the cream was fully whipped and that everything was gently folded. Also, don’t skip the plastic wrap on top before freezing. It really helps.
Can I double the recipe? Absolutely. Just make sure your mixing bowl is big enough and that the final container has enough room.
How long does it last? Two weeks is your sweet spot. After that, the texture might start to change a bit.
Wrap Up
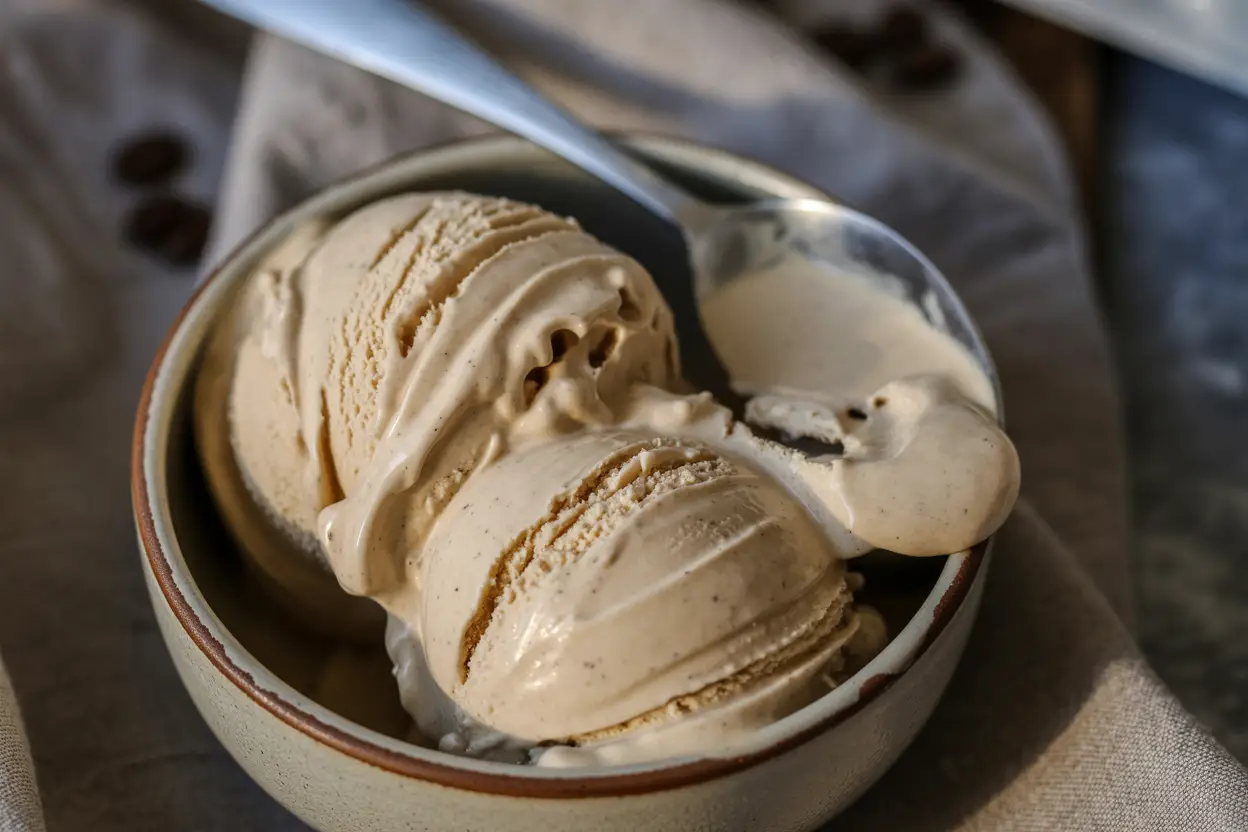
And just like that, you’ve made ice cream. Real, creamy, coffee-flavored ice cream. No eggs. No machine. No stress.
There’s something kind of powerful about taking a handful of simple ingredients and turning them into something that tastes like it came straight from a fancy café. And the fact that you did it without even breaking a sweat? Yeah, that’s something to be proud of.
If you try this, I’d love to hear how it goes. Drop a comment with your favorite twist, your “oops” moments (we all have them), or even just a simple “it worked!” Always here to cheer you on.
Now go enjoy that scoop—you earned it.