
Let’s be real—store-bought chocolate ice cream kind of feels like a gamble.
Sometimes it hits just right, but most of the time… it’s either too icy, too airy, or weirdly artificial. And if you’ve ever wondered what it would feel like to make the creamiest, richest chocolate ice cream right in your own kitchen—where you’re in charge of every delicious detail—this post is for you.
No fancy chef hats required. Just a saucepan, a bit of patience, and a serious love for all things chocolate.
So grab a spoon and let’s dive in.
What You’ll Need
You don’t need a ton of ingredients. Just a few rich, real ones that work together like magic.
- 2 cups heavy cream
- 1 ½ cups whole milk
- ¾ cup granulated sugar
- ¼ cup unsweetened cocoa powder (go for quality!)
- 3 oz dark chocolate (70%–85% cacao), chopped
- ⅛ tsp sea salt
- 2 tsp pure vanilla extract
That’s it. No eggs. No drama. Just smooth, creamy chocolate goodness waiting to happen.
Tools You’ll Need
Before we jump in, here’s what to have on hand to make your life a little easier:
- Medium saucepan
- Whisk
- Fine mesh strainer (yes, this matters)
- Heatproof bowl
- Ice cream maker (any type works)
- Freezer-safe airtight container
- Rubber spatula
- Ice cream scoop (preferably the one you forgot you had)
The Process (Yes, You’ve Got This)
This isn’t complicated. You don’t need to babysit a thermometer or do anything too chef-y.
Step 1: Build the base
Whisk together your heavy cream, milk, sugar, cocoa powder, and salt in a saucepan. Set it over medium heat and whisk until everything’s combined and smooth.
Let it heat up until you see gentle bubbles—don’t let it boil like crazy. You’re just helping the cocoa bloom and the sugar dissolve so it’s silky and chocolatey all the way through.
Step 2: Add real chocolate
Remove it from the heat. Toss in the chopped dark chocolate. Give it a minute to melt, then whisk until it’s glossy and smooth. Take your time here—it’s worth it.
Step 3: Add vanilla
Stir in the vanilla. It might not seem like a big deal, but it makes the chocolate pop in the best way.
Step 4: Strain and chill
Strain the mixture into a bowl to catch any lumps. Even if you think it looks fine, strain it anyway. This step is what takes your ice cream from “hey this is good” to “omg did I seriously make this?!”
Cover and chill in the fridge for at least 2 hours. Overnight is even better. It lets the flavors deepen and sets you up for ultra-smooth churning.
Step 5: Churn
Once your base is cold, pour it into your ice cream maker. Follow the manufacturer’s instructions (most take about 20–30 minutes). You’ll know it’s ready when it looks like soft serve.
Step 6: Freeze
Transfer your ice cream to a container, smooth the top, and press a piece of parchment paper or plastic wrap directly onto the surface. Freeze for at least 4 hours until it firms up into scoopable glory.
Pro Tips You’ll Wish You Knew Earlier
- Don’t skip the chill time
Rushing this part leads to grainy, icy texture. Cold base = creamy results. - Use good chocolate
This isn’t the time for chalky baking bars or mystery cocoa. Quality ingredients make a HUGE difference here. - Taste as you go
Before you freeze it, taste your base. Want it darker? Add a bit more cocoa. Sweeter? A touch more sugar. Trust your taste buds. - Pre-freeze your container
If you’re feeling fancy, throw your storage container in the freezer while you churn. It helps keep the ice cream from melting too much before setting. - Serve with warm brownies
Not required… but absolutely recommended.
Substitutions & Variations
This recipe is super flexible. Here are a few fun ways to make it your own:
- Coconut version: Use full-fat coconut milk in place of cream/milk. Use dairy-free chocolate. Boom—vegan.
- Sugar swap: Coconut sugar or maple syrup can add a twist in flavor. You might have to tweak amounts depending on sweetness.
- Flavor twist: Add a few drops of peppermint extract, or stir in espresso powder for mocha vibes.
- Add-ins: Right before the churn is done, mix in crushed Oreos, chopped nuts, chocolate chips, or even swirls of peanut butter. Go wild.
Can You Make It Ahead?
Totally.
In fact, it’s better when you do. Make the base the night before. Let it sit and get happy in the fridge. Then churn and freeze the next day. Perfect texture, perfect flavor.
If you’re entertaining, this is a great one to make up to 2–3 days in advance. Just keep it tightly sealed and you’re good to go.
Let’s Talk Leftovers
If there’s any left (and that’s a big IF), here’s how to store it like a pro:
- Store in an airtight container
- Press parchment paper or plastic wrap directly onto the surface
- Freeze for up to 2 weeks for best texture
- If it gets too hard, let it sit on the counter for 5–10 minutes before scooping
Bonus tip: If you’re planning to serve it to guests, scoop it into bowls ahead of time and refreeze. Then you’re not scrambling during dessert time.
Nutritional Info (Rough Estimate Per ½ Cup)
- Calories: 300
- Fat: 18g
- Carbs: 30g
- Sugar: 25g
- Protein: 5g
Want to lighten it up? Try lower-fat dairy or reduce the sugar slightly. Want to go full indulgence? Drizzle with hot fudge and don’t look back.
FAQ
Can I make this without an ice cream maker?
You can! Pour the chilled base into a loaf pan, freeze, and stir every 30 minutes for a few hours. Not quite the same texture, but still delicious.
Do I have to strain the base?
Yes. This small step makes a big difference. No one likes gritty ice cream.
Can I use semi-sweet chocolate instead of dark?
Sure, just reduce the sugar a bit if you don’t want it too sweet.
How long does it keep?
For peak creaminess, eat within 2 weeks. After that, it may get a bit icy.
Why isn’t it as scoopable as store-bought?
Homemade ice cream doesn’t have the same stabilizers. If it’s too firm, just let it sit out for a few minutes before scooping.
Wrap Up
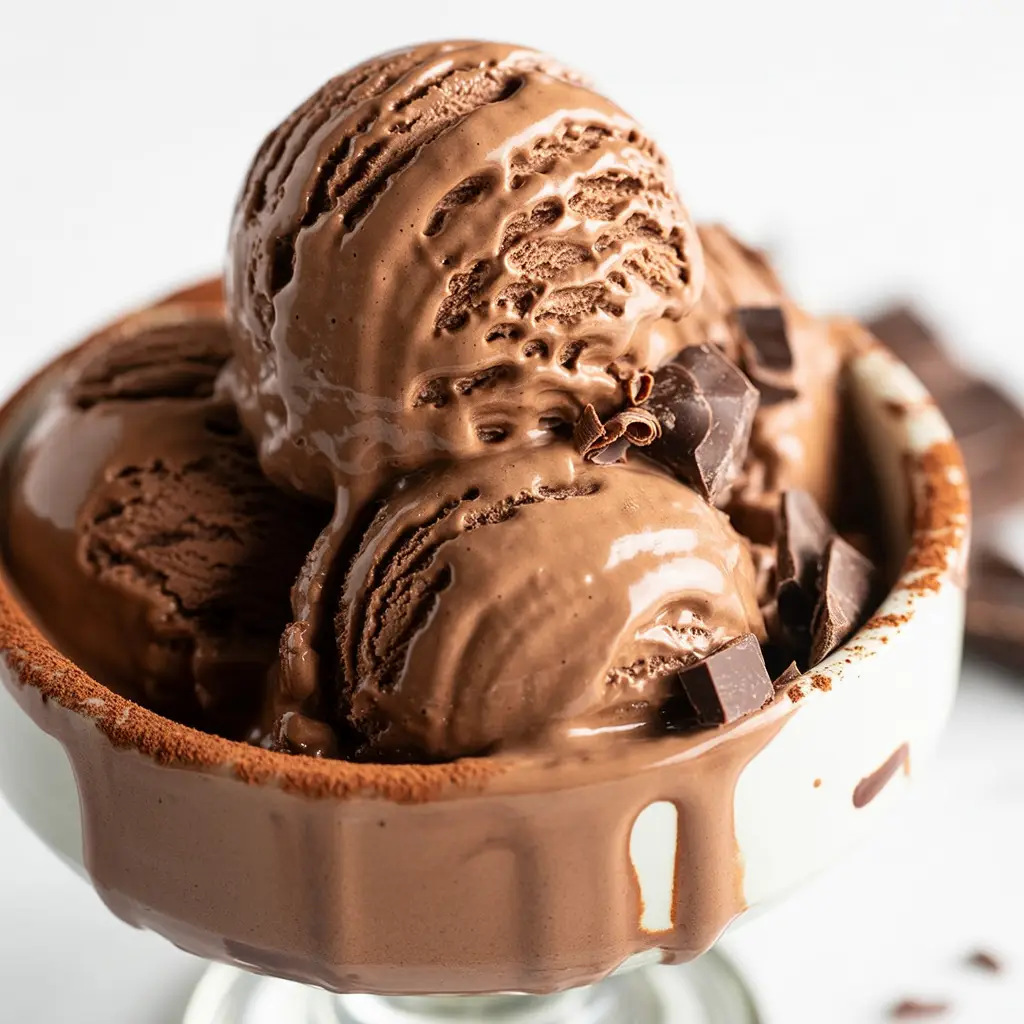
This chocolate ice cream is the kind of thing you make once… and then wonder why you ever bought it in a tub. It’s rich, it’s creamy, and it tastes like actual chocolate—not just sweet brown cold stuff.
So give it a try. Make it for yourself, for your friends, for no reason at all except that you deserve something awesome. And when you do, come back and tell me how it turned out. I’d love to hear your version, your twists, your toppings.
Because honestly? This is one recipe you’ll want to brag about. And I’m 100% here for it.