
I have a soft spot for those classic, no-fuss layered desserts. They remind me of potlucks and family gatherings, where someone always brought a magical pan of something creamy, crunchy, and absolutely heavenly.
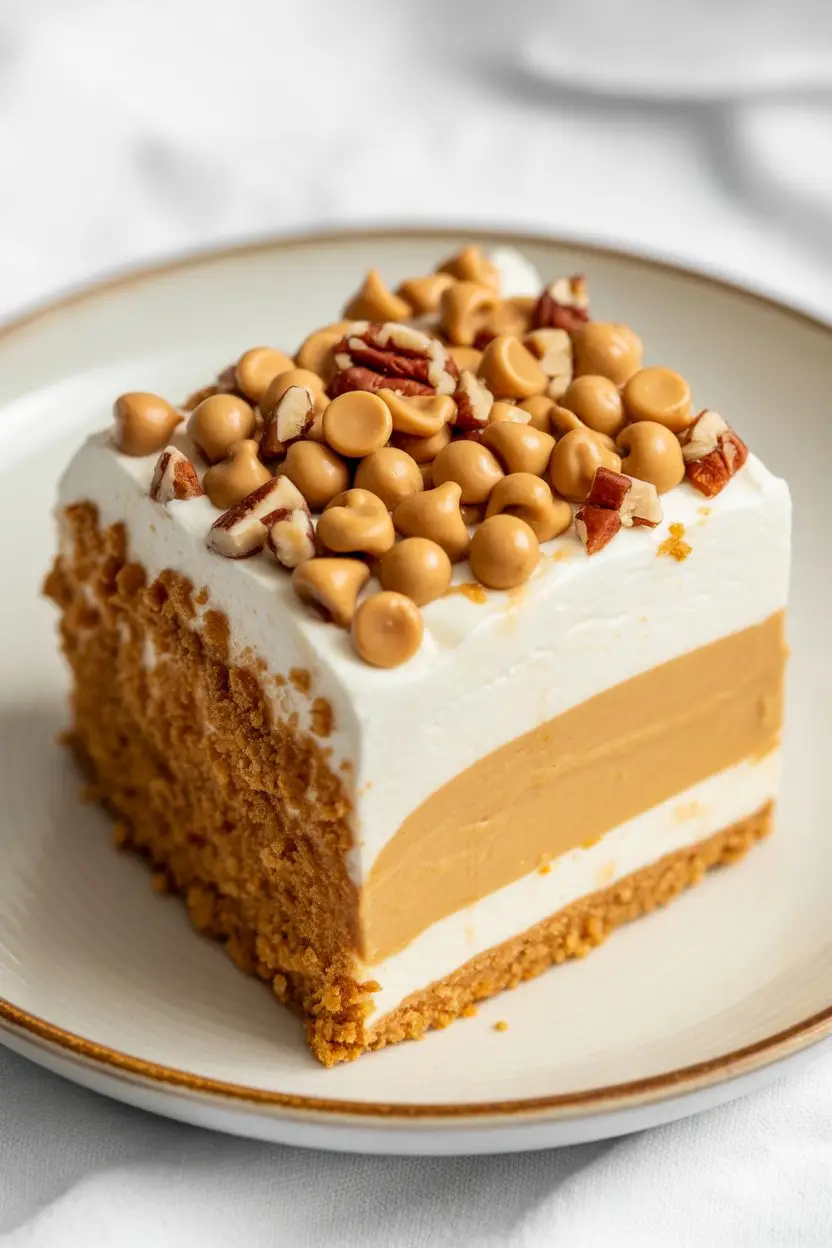
This Butterscotch Lush Cake is my take on that tradition. It’s a dessert that seems impressive but is secretly simple to assemble. We’re talking a buttery pecan crust, a tangy cream cheese layer, silky butterscotch pudding, and a cloud of whipped topping.
It’s the kind of treat that quiets a room, where the only sound is the clinking of forks against plates. Let’s create a little bit of that magic in your kitchen.
What You’ll Need
This recipe is all about layers. Here’s the breakdown of what you’ll need for each part of this delicious cake.
For the Pecan Crust:
- 1 cup all-purpose flour
- 1/2 cup unsalted butter, softened
- 1 cup chopped pecans
For the Cream Cheese Layer:
- 8 ounces cream cheese, softened to room temperature
- 1 cup powdered sugar
- 1 cup frozen whipped topping (like Cool Whip), thawed
For the Pudding Layer:
- 2 (3.4 ounce) packages of instant butterscotch pudding mix
- 3 cups cold milk
For the Topping:
- 8 ounces frozen whipped topping, thawed
- 1/2 cup butterscotch chips for garnish
- 1/4 cup chopped pecans for garnish
Required Kitchen Tools
You won’t need any fancy gadgets for this recipe. Just a few kitchen basics will do the trick.
- 9×13 inch baking dish
- Mixing bowls (medium and large)
- Electric mixer (handheld or stand mixer)
- Whisk
- Spatula
- Measuring cups and spoons
How to Make Butterscotch Lush Cake
Just follow these steps, and you’ll have a perfect layered dessert. The key is giving each layer the time it needs to set.
Part 1: The Crust
Step 1: Preheat your oven to 350°F (175°C). There’s no need to grease your 9×13 inch pan.
Step 2: In a medium bowl, combine the flour, softened butter, and chopped pecans. Mix with a fork or your hands until it forms a coarse, crumbly mixture.
Step 3: Press the mixture firmly and evenly into the bottom of the baking dish. Bake for 15-20 minutes, or until it’s lightly golden brown.
Step 4: Remove the crust from the oven and let it cool completely. This is very important, so don’t rush it!
Part 2: The Layers
Step 5: While the crust cools, prepare the cream cheese layer. In a large bowl, beat the softened cream cheese and powdered sugar with an electric mixer until it’s completely smooth and free of lumps.
Step 6: Gently fold in 1 cup of the thawed whipped topping with a spatula until just combined. Spread this mixture evenly over the COOLED crust.
Step 7: In another bowl, whisk together the two packages of instant butterscotch pudding mix and the cold milk. Whisk for about 2 minutes, until it starts to thicken.
Step 8: Carefully pour and spread the pudding mixture over the cream cheese layer, making sure it’s even.
Part 3: The Finishing Touches
Step 9: Let the pudding layer set. Place the dish in the refrigerator for at least 15-20 minutes to allow the pudding to firm up before adding the final layer.
Step 10: Once the pudding is set, spread the remaining thawed whipped topping over the top.
Step 11: Sprinkle the butterscotch chips and remaining chopped pecans over the top for garnish.
Step 12: Cover the dish and refrigerate for at least 4 hours, but overnight is even better. This allows all the flavors to meld together and the layers to set perfectly.
Pro Tips
I’ve made this dessert more times than I can count. Here are a few things I’ve learned that make a big difference.
- Cool the Crust Completely: I mentioned it before, but it’s the most crucial tip. A warm crust will melt the cream cheese layer, creating a soupy mess. Be patient!
- Room Temperature Cream Cheese: If your cream cheese is cold, it will be lumpy no matter how much you beat it. Set it out on the counter for about an hour before you start.
- Don’t Undermix the Pudding: Whisk the pudding and milk for the full two minutes as the package directs. This ensures it will thicken properly and create a distinct, firm layer.
- Chill, Chill, and Chill Some More: This dessert’s success depends on chilling time. Rushing it will result in sloppy layers that run together when you serve it. The final 4-hour chill is non-negotiable.
| Task | Estimated Time |
|---|---|
| Prep Time | 25 minutes |
| Bake Time | 20 minutes |
| Chill Time | 4+ hours |
| Total Time | ~5 hours |
Substitutions and Variations
Feel free to get creative! This recipe is a great base for experimentation.
- Different Nuts: Walnuts or even almonds work well in the crust instead of pecans.
- Crust Variations: You can use a pre-made graham cracker or shortbread crust to save time.
- Pudding Flavors: Not a butterscotch fan? Try chocolate, vanilla, or even banana cream pudding for a totally different dessert.
- Extra Crunch: Sprinkle crushed toffee bits or Heath bars on top for an added layer of texture and flavor.
Dietary Swaps & Nutritional Info
While this is an indulgent dessert, you can make a few tweaks. A small slice goes a long way!
(Nutritional values are estimates and will vary based on the specific ingredients you use.)
Nutrition per serving (approximate): Calories: 450 kcal, Fat: 28g, Carbs: 45g, Sugar: 35g, Protein: 5g.
| To Make It… | Component | Substitution Suggestion |
|---|---|---|
| Lower Sugar | Pudding/Topping | Use sugar-free pudding mix and sugar-free whipped topping. |
| Gluten-Free | Crust | Use a 1:1 gluten-free flour blend or a crust made from crushed gluten-free cookies. |
| Nut-Free | Crust/Topping | Omit the pecans. Use crushed pretzels or oats in the crust for a similar texture. |
Make-Ahead and Storage Tips
This is the perfect make-ahead dessert, which is great for parties or holidays.
You can assemble the entire cake up to 24 hours in advance. In fact, it often tastes even better the next day as the layers settle.
To store leftovers, cover the dish tightly with plastic wrap or a lid. It will keep in the refrigerator for up to 4 days. The crust may soften slightly over time, but it will still be delicious.
Frequently Asked Questions
Q1. Can I use homemade pudding instead of instant mix?
Ans: Absolutely! Just make sure your homemade pudding is completely cooled and thick before spreading it over the cream cheese layer. A warm pudding will cause the layers to mix.
Q2. My layers are bleeding into each other. What did I do wrong?
Ans: This usually happens for two reasons: the crust wasn’t fully cooled, or you didn’t chill the dessert long enough between steps or at the end. Patience is key with a lush cake!
Q3. Can I freeze Butterscotch Lush Cake?
Ans: You can, but with a slight caution. The texture of the cream cheese and pudding can change a little upon thawing. It’s best enjoyed fresh, but if you need to freeze it, wrap it tightly and it should be okay for up to a month.
Q4. Why is my pudding layer runny?
Ans: Make sure you used the correct milk-to-pudding-mix ratio listed on the box and whisked it long enough to thicken. Using non-dairy milk can sometimes affect how instant pudding sets up, so stick with cold dairy milk for the best results.
Wrapping Up
There you have it—a dessert that’s guaranteed to be a hit. The combination of the salty, crunchy crust with the sweet, creamy layers is just impossible to resist.
It’s a recipe that carries a bit of nostalgia and a lot of flavor, all without needing expert baking skills. I truly hope you give it a try.
If you make this Butterscotch Lush Cake, please drop a comment below! I’d love to hear how it turned out or see any creative twists you added.