
Ok, so you know that amazing smell of a warm cinnamon roll? That gooey, sweet, buttery goodness? But then you remember it takes, like, half a day to make them from scratch. Ugh.
What if you could get all that amazing flavor but in a cookie? A cookie that you can make whenever you want without waiting for dough to rise.
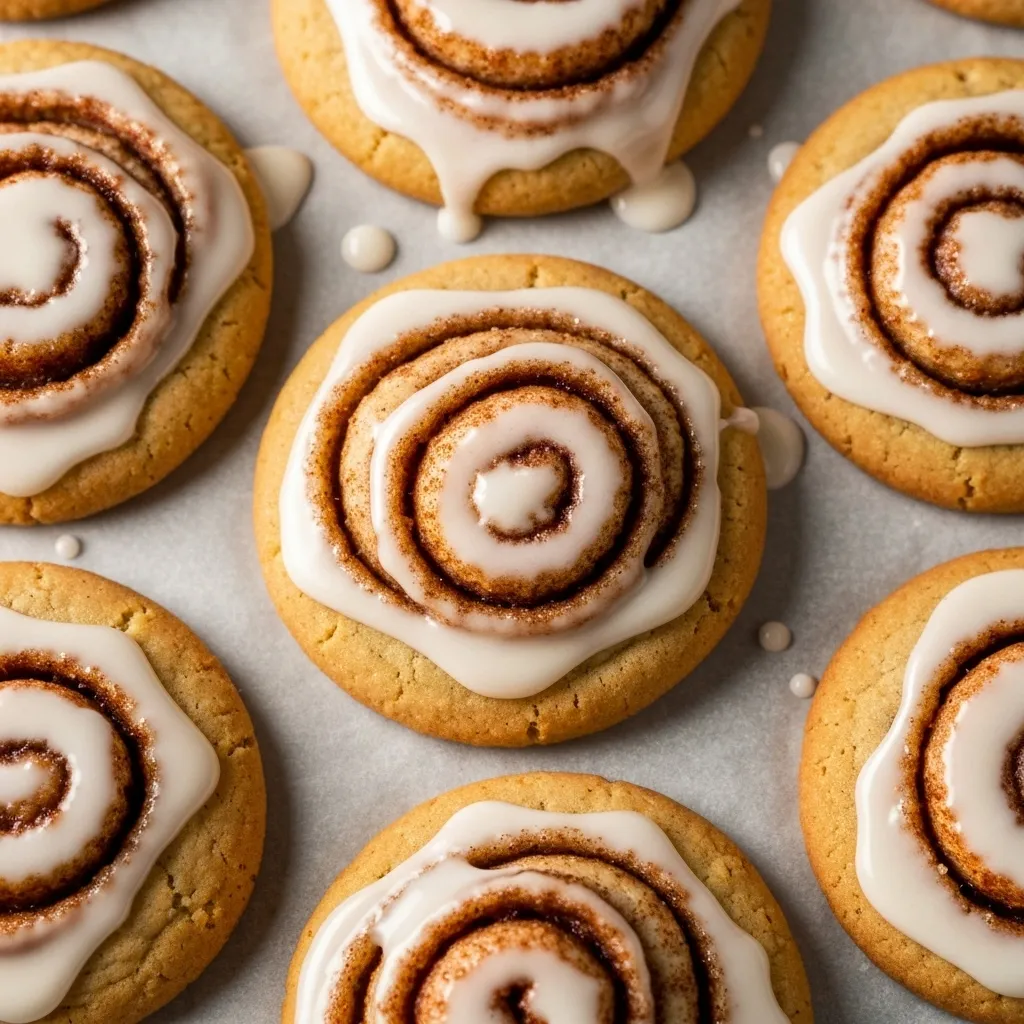
Well, you can. These cinnamon roll cookies are the real deal. They look just like tiny cinnamon rolls, and they taste even better.
Let’s get into it and make your kitchen smell like heaven.
What You’ll Need
This recipe has three parts: the cookie dough, the cinnamon filling, and the yummy glaze on top. Don’t worry, it’s all super simple stuff.
For the Cookie Dough:
- 1 cup unsalted butter, softened (that means you can press it easily with your finger)
- 3/4 cup granulated sugar
- 1 large egg
- 1 teaspoon vanilla extract
- 2 ½ cups all-purpose flour
- 1/2 teaspoon baking powder
- 1/4 teaspoon salt
For the Cinnamon Filling:
- 1/4 cup unsalted butter, softened
- 1/2 cup packed brown sugar
- 1 tablespoon ground cinnamon
For the Glaze:
- 1 cup powdered sugar
- 2-3 tablespoons milk or heavy cream
- 1/2 teaspoon vanilla extract
Tools for the Job
You don’t need a bunch of fancy stuff. Just some basic kitchen tools will do the trick.
- Mixing bowls
- Electric mixer (or a whisk and some arm muscle)
- Spatula
- Plastic wrap
- Rolling pin
- Baking sheets
- Parchment paper
- A sharp knife or unflavored dental floss (trust me on this)
How to Make Cinnamon Roll Cookies
Just follow these steps, and you’ll be golden. It’s way easier than it looks.
Step 1: Make the Dough
In a big bowl, beat the softened butter and sugar together until it’s light and fluffy. This usually takes a couple of minutes. Then, beat in the egg and vanilla extract.
Step 2: Add Dry Stuff
In another bowl, mix the flour, baking powder, and salt. Slowly add this dry mix to your wet butter mix until it’s all just combined. Don’t overmix it, or your cookies will be tough.
Step 3: Chill the Dough
Form the dough into a flat disk, wrap it tightly in plastic wrap, and stick it in the fridge for at least 1 hour. This step is super important, so don’t skip it!
Step 4: Make the Filling
While the dough is chilling, mix the softened butter, brown sugar, and cinnamon in a small bowl until it’s like a paste.
Step 5: Roll it Out
Take your chilled dough out of the fridge. On a lightly floured surface, roll it out into a rectangle, about 1/4 inch thick.
Step 6: Spread the Filling
Spread that yummy cinnamon filling all over the dough, leaving a small border around the edges.
Step 7: Roll it Up
Carefully roll the dough into a tight log, starting from one of the long sides. Wrap the log in plastic wrap and put it back in the fridge for another 30 minutes. This makes it easier to slice.
Step 8: Slice and Bake
Preheat your oven to 375°F (190°C). Take the chilled log and slice it into 1/4-inch thick rounds. Place them on a baking sheet lined with parchment paper.
Step 9: Bake ’em!
Bake for 9-11 minutes, or until the edges are lightly golden. Let them cool on the baking sheet for a few minutes before moving them to a wire rack to cool completely.
Step 10: Make the Glaze
While the cookies are cooling, whisk together the powdered sugar, milk, and vanilla in a small bowl until it’s smooth. Add more milk if it’s too thick or more sugar if it’s too thin.
Step 11: Drizzle Away
Once the cookies are totally cool, drizzle the glaze over them. Let the glaze set for a bit, and then you can dig in!
Pro Tips
I’ve made these a LOT, and I’ve learned a few things that really help.
- Don’t Skip Chilling: I know I said it before, but seriously. Chilling the dough keeps the cookies from spreading into flat blobs. It’s the key to getting that perfect swirl.
- Use Dental Floss: It sounds weird, but unflavored dental floss is the best way to cut the cookie log. It gives you a clean cut without squishing the roll. Just slide it under the log and cross the ends over the top to slice.
- Room Temp Ingredients: Make sure your butter and egg are at room temperature before you start. They mix together so much better and give you a smoother dough.
Swaps and Changes
Want to mix it up? Here are a few ideas.
| Original Ingredient | Easy Swap Idea | What it Does |
|---|---|---|
| All-Purpose Flour | 1-to-1 Gluten-Free Flour | Makes the cookies gluten-free. |
| Brown Sugar | Coconut Sugar | Adds a slightly different, caramel-like flavor. |
| Vanilla Extract | Almond or Maple Extract | Changes the flavor profile. A little goes a long way! |
Make-Ahead and Storage Tips
These are great for making ahead of time. You can make the dough log and keep it in the fridge for up to 3 days. Or, freeze the log or the unbaked slices for up to 3 months.
Once baked, store the cookies in an airtight container at room temperature. They’ll stay good for about 5 days. If you want to keep them longer, you can freeze the baked cookies, too.
| Pairing Suggestions | Why It Works |
|---|---|
| A Hot Cup of Coffee | The bitterness of coffee cuts through the sweetness of the cookie. Classic combo. |
| A Cold Glass of Milk | The perfect partner for any cookie, period. |
| Hot Tea with Cinnamon | Doubles down on that warm, cozy spice flavor. |
FAQs
Q1. Why did my cookies spread out so much?
Ans: Your dough probably wasn’t cold enough. Make sure to chill the dough disk and the final log for the full time. A cold dough holds its shape way better in the hot oven.
Q2. Can I add nuts or other things?
Ans: Totally! You can sprinkle some finely chopped pecans or walnuts over the cinnamon filling before you roll up the log.
Q3. My glaze is too thin/thick. What do I do?
Ans: It’s an easy fix! If it’s too thin, just add a little more powdered sugar. If it’s too thick, add milk one tiny splash at a time until it’s the right consistency for drizzling.
Wrapping Up
So there you have it. A super easy way to get that cinnamon roll fix without all the work.
These cookies are fun to make and even more fun to eat. Give them a try!
When you do, leave a comment below and let me know how they turned out. I’d love to hear about it