
You ever have those days where you want something cold, creamy, and wildly satisfying—but don’t want to drag out a fancy machine or make peace with your dairy sensitivity? Yeah, same.
That’s where this absolute dreamboat of a recipe comes in.
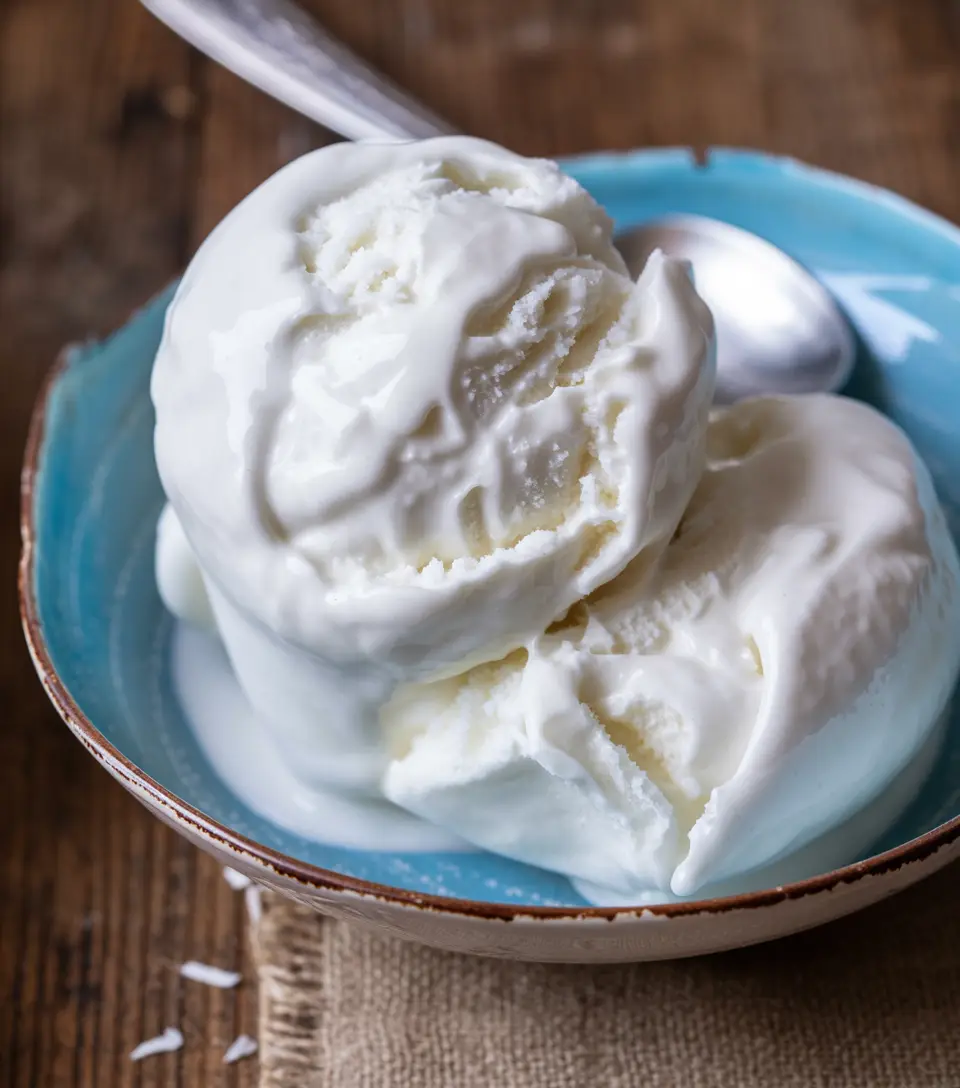
No-churn coconut ice cream. No dairy, no drama, no standing by the stove hoping a custard doesn’t scramble on you. Just a few ingredients, a blender, and your freezer. And the best part? It actually tastes good. Like… make-it-again good. Not “I guess this is fine for being dairy-free” good. There’s a difference, and this hits the real kind of good.
But before we get into the steps, let’s talk about what makes this recipe worth saving to your phone, emailing to yourself “just in case,” and telling your cousin about even though she never makes anything you send her.
This coconut ice cream is thick. It’s rich. It’s got that smooth texture you usually only get from churning for twenty minutes while praying to the ice cream gods. And if you do it right—and by that, I mean literally just follow this chill process—you’ll have ice cream that scoops like a dream and tastes like a tropical getaway in a bowl.
What You’ll Need
Here’s the rundown of what you’ll need. No long grocery list, no random hard-to-pronounce health foods. Just real ingredients that deliver.
- 1 can full-fat coconut milk
- 1 can full-fat coconut cream
- ½ cup sugar (or less if you’re one of those “not too sweet” people)
- ½ tsp vanilla extract (optional, but it does round out the flavor)
That’s it. Four ingredients. You can probably count that on one hand without even putting your drink down.
Real Talk Before You Start
Now before we go any further, I just want to say this: If this is your first time making no-churn ice cream, don’t stress. This isn’t one of those baking recipes where one wrong move and the whole thing turns into soup or a solid rock. Coconut ice cream is surprisingly forgiving, and if you mess up a little? It’s still cold, sweet, and probably better than anything you could’ve bought.
That said, let’s go over a few things to make your life easier.
Pro Tips
1. Freeze in ice cube trays. I know, it sounds a little random. But trust me—this is a game-changer. When you freeze the mixture in cubes first, it blends way better. Less stress on your blender, less mess for you, and smoother ice cream overall. You’re welcome.
2. Use the full-fat versions. If the can says “lite” or “reduced fat,” put it back. We’re not here to suffer. Full-fat coconut milk and cream are what make this recipe actually creamy instead of watery and sad. Don’t skimp here.
3. Blend it in batches. If your blender starts sounding like it’s about to lift off into space, stop and give it a second. Blend the cubes in smaller amounts, and add just a splash of coconut milk if it needs help. There’s no medal for doing it all at once.
4. Serve soft or scoop later. This recipe gives you options. Want that soft-serve, creamy texture? Eat it right after blending. Want perfect little scoops to impress your friends (or yourself)? Freeze it again for an hour or two in a container. Then scoop. Flex.
5. Flavor it up. This base is delicious on its own, but don’t be afraid to stir in some chopped mango, shredded coconut, a swirl of peanut butter, or even a handful of chocolate chips. You deserve joy.
Tools You’ll Need
You don’t need a fully stocked chef’s kitchen, but having these on hand will make your life easier:
- Mixing bowl
- Whisk (or a spoon, honestly)
- Ice cube trays (or silicone molds if you’re fancy)
- High-speed blender or food processor
- Freezer-safe container with lid
Let’s Talk Substitutions
Because sometimes you’re out of something or you just want to make it your own. Totally fair.
No coconut cream? Use another can of full-fat coconut milk. It’ll be slightly less rich, but still very good.
Want to use maple syrup or honey instead of sugar? Totally works. Start with ¼ cup and adjust to taste.
Need it lower sugar? Use a sugar-free sweetener like monk fruit or stevia. It’ll freeze a little firmer, so let it thaw slightly before scooping.
Flavor ideas? Cinnamon, lime zest, cardamom, almond extract, cocoa powder… go wild.
Optional: Make Ahead Tip
You can totally mix up the base and leave it in the fridge for a few hours before freezing. This helps the flavors meld and makes the final texture even creamier. Or if you’re really planning ahead, freeze the ice cube trays a day or two in advance, then just blend when you’re ready.
Instructions
Here’s how you go from “I could really go for some ice cream right now” to “I made this and it’s incredible.”
- In a bowl, whisk together the coconut milk, coconut cream, sugar, and vanilla extract until it’s smooth and the sugar is mostly dissolved.
- Pour the mixture into ice cube trays and pop them into the freezer for at least 6 hours, or overnight if you’re not in a rush.
- Once the cubes are frozen solid, pop them out and blend them in a high-speed blender or food processor. Start slow, then ramp up. Add a splash of coconut milk if needed.
- Once the mixture is smooth and creamy, you’ve got two options:
- Eat it right away (soft-serve style)
- Transfer it to a container and freeze for another hour or two for a firmer, scoopable texture
That’s it. No weird steps. No long waiting periods. No churn, no fuss.

A Few Extras You Might Appreciate
Nutritional Info (per serving, makes 4–6):
- Calories: ~330
- Fat: 30g
- Carbs: 20g
- Protein: 2g
- Sugar: 15–20g (depending on how sweet you go)
Pairing ideas? This ice cream tastes amazing on top of grilled pineapple, banana pancakes, or next to a warm chocolate lava cake if you’re feeling extra. And if you have zero plans, it’s also perfect with a spoon and a blanket.
Quick hack for portioning? Scoop the blended mix into silicone muffin molds, freeze, and store. Instant ice cream pucks for later.
Leftovers & Storage
Store in an airtight container in the freezer. Press a piece of parchment or wax paper onto the surface to help prevent ice crystals. It’ll keep for about a week, maybe two, before the texture starts to shift.
If it’s too firm to scoop straight out of the freezer (and it probably will be), just let it sit out for 5–10 minutes. Then scoop away.
FAQ
Can I make this without a blender? Not really. You need something strong to break up the frozen cubes. A food processor works too, though.
Why did mine turn out icy? Usually it’s because you used low-fat coconut milk or didn’t blend long enough. Also, sugar helps keep it creamy—so cutting back too much can change the texture.
Can I double the recipe? Yes! Just make sure your blender can handle it. If not, blend in batches.
Can I use almond milk instead? Nope. It’s not creamy enough. This recipe only works with full-fat canned coconut.
Can I add protein powder? Technically yes, but it’ll change the texture and might make it grainy. If you try it, use a fine, neutral-flavored one and blend well.
Wrap Up
You don’t need a reason to make this ice cream.
You don’t need a party. Or a hot summer day. Or a new health goal. Sometimes you just need something cold and creamy that you made yourself, with ingredients you can pronounce, and no weird aftertaste.
So try it. See how it goes. Swap the vanilla for cinnamon, swirl in some almond butter, maybe crumble a cookie on top. Make it your own.
And if you do make it? Tell me. I want to know what you tried, what worked, what didn’t. What you’d do differently next time. Or if there even needs to be a next time—because you nailed it on the first try.
Go make something good. You’ve got this.