
I have this problem where I can never decide what I want for dessert. It’s a real struggle.
One minute I’m dreaming of a warm, gooey cinnamon roll. The next, my brain switches to a rich, creamy slice of cheesecake.
It’s like asking a parent to pick a favorite child. You just can’t do it. Or at least you’re not supposed to.
So one day, after staring into my fridge for what felt like an eternity, I had a thought. Why not both? Why can’t we just smash these two incredible desserts together and see what happens?
Well, I did it. And what happened was pure, undeniable magic.
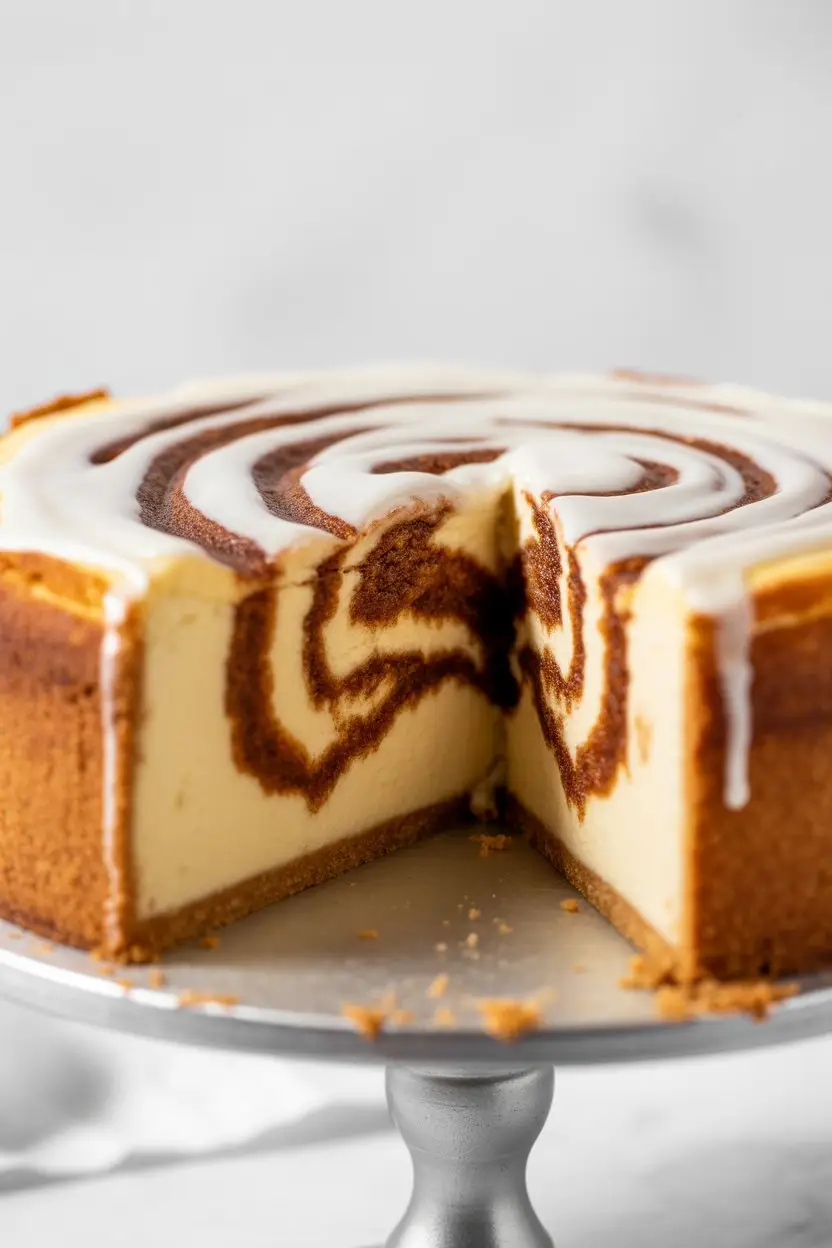
This isn’t just a cheesecake with some cinnamon sprinkled on top. This is the real deal. It has a buttery crust, a tangy cheesecake filling, a thick, gooey cinnamon-sugar swirl, and a cream cheese icing drizzled on top.
It’s decadent. It’s a little over the top. And it’s probably one of the best things I’ve ever made. So let’s get to it.
What You’ll Need
Here’s the full list of ingredients. Don’t let it scare you; we’re building this masterpiece layer by layer.
For the Crust:
- 2 cups all-purpose flour
- 1/2 cup granulated sugar
- 1 teaspoon ground cinnamon
- 1/2 cup (1 stick) cold unsalted butter, cut into cubes
- 1 large egg yolk
For the Cheesecake Filling:
- 32 ounces (four 8-ounce packages) full-fat cream cheese, softened
- 1 1/2 cups granulated sugar
- 1/2 cup sour cream, at room temperature
- 1 teaspoon vanilla extract
- 4 large eggs, at room temperature
For the Cinnamon Swirl:
- 1/2 cup (1 stick) unsalted butter, melted
- 1 cup packed brown sugar
- 2 tablespoons ground cinnamon
For the Cream Cheese Icing:
- 4 ounces cream cheese, softened
- 1 cup powdered sugar
- 1/4 cup milk
- 1/2 teaspoon vanilla extract
Pro Tips
I’ve made a few cheesecakes that were… let’s call them “learning experiences.” Here are some things I learned the hard way so you don’t have to.
1. Room Temperature is NOT a Suggestion.
Seriously. If your cream cheese, sour cream, and eggs are cold, your filling will be lumpy. No amount of mixing will save it. Set them out on the counter for at least 2 hours before you start. Trust me on this.
2. Don’t Overmix the Eggs.
When you add the eggs to the filling, mix on low speed and only until they are just combined. Overmixing adds too much air, which causes the cheesecake to puff up in the oven and then tragically crack as it cools.
3. The Water Bath is Your Best Friend.
I know, it sounds like an extra, annoying step. But a water bath (or a *bain-marie* if you’re feeling fancy) is the secret to a perfectly creamy, crack-free cheesecake. The steam creates a humid environment, allowing the cake to cook gently and evenly.
4. Let It Cool Down Slowly.
Sudden temperature changes are the enemy of cheesecake. Once it’s done baking, turn off the oven, crack the door open, and let the cheesecake cool inside for an hour. This gradual cooling process also helps prevent cracks.
Tools Required for the Job
You don’t need a professional kitchen, but these tools will make your life a whole lot easier.
- 9-inch springform pan
- Large roasting pan (for the water bath)
- Electric mixer (stand or handheld)
- Mixing bowls (various sizes)
- Measuring cups and spoons
- Spatula
- Whisk
- Aluminum foil
Substitutions and Variations
Want to mix things up? I get it. Here are a few ideas.
The Crust: Not a fan of this shortbread-style crust? You can easily substitute it with a classic graham cracker crust. Just crush about 1 1/2 cups of graham crackers and mix with 6 tablespoons of melted butter and 1/4 cup of sugar.
Go Nuts: Feel free to add 1/2 cup of chopped pecans or walnuts to the cinnamon swirl mixture for some extra crunch and flavor.
Gluten-Free Option: You can make this gluten-free! Use a quality 1-to-1 gluten-free baking flour for the crust. The rest of the ingredients are naturally gluten-free, but always double-check your labels, especially for powdered sugar and vanilla.
| Original Ingredient | Suggested Swap | Notes |
|---|---|---|
| Flour Crust | Graham Cracker Crust | Classic and easy. |
| Sour Cream | Full-Fat Greek Yogurt | Adds a similar tang. |
Make-Ahead Tips
This cheesecake is actually best when made ahead of time. It needs a good, long chill in the fridge to set up properly.
You can bake the entire cheesecake 1 to 2 days in advance. Let it cool completely, then cover it and store it in the refrigerator. Wait to add the cream cheese icing until right before you plan to serve it for the best look and texture.
How to Make This Decadent Cinnamon Roll Cheesecake
Alright, let’s build this thing. Follow these steps and you’ll be golden.
Step 1: Prep Your Oven and Pan
Preheat your oven to 350°F (175°C). Wrap the outside of your 9-inch springform pan with two layers of heavy-duty aluminum foil. This is super important for keeping water out during the water bath. Set it aside.
Step 2: Make the Crust
In a medium bowl, whisk together the flour, sugar, and cinnamon. Add the cold, cubed butter. Use a pastry cutter or your fingers to cut the butter into the flour until the mixture looks like coarse crumbs. Stir in the egg yolk until a dough forms. Press this dough evenly into the bottom and slightly up the sides of your prepared springform pan. Bake for 10-12 minutes, until lightly golden. Let it cool while you make the filling.
Step 3: Mix the Cinnamon Swirl
In a small bowl, combine the melted butter, brown sugar, and cinnamon. Whisk it all together until it’s smooth. This is the gooey, magical part. Set it aside.
Step 4: Create the Cheesecake Filling
In a large bowl with an electric mixer, beat the softened cream cheese on medium speed until it’s completely smooth and creamy. Scrape down the sides of the bowl. Add the sugar and beat until combined. Then, mix in the sour cream and vanilla. Remember that pro tip? Add the eggs one at a time, mixing on low speed just until the yellow yolk disappears. Do not overmix!
Step 5: Assemble and Swirl
Pour half of the cheesecake batter over your cooled crust. Dollop half of the cinnamon swirl mixture over the batter. Use a knife to gently swirl it through, creating a marbled pattern. Pour the remaining cheesecake batter on top, then dollop the rest of the cinnamon mixture. Swirl it again. Don’t go crazy with the swirling, or it’ll all just blend together.
Step 6: Bake in a Water Bath
Place your foil-wrapped springform pan inside a large roasting pan. Carefully pour hot water into the roasting pan until it comes about halfway up the sides of the cheesecake pan. Bake for 60-70 minutes. The cheesecake is done when the edges are set, but the center still has a slight jiggle to it.
Step 7: Cool It Down
Turn off the oven and prop the door open with a wooden spoon. Let the cheesecake cool in the oven for 1 hour. Then, remove it from the water bath, take off the foil, and let it cool on a wire rack to room temperature. Finally, cover it and refrigerate for at least 6 hours, but overnight is even better.
Step 8: Whip Up the Icing and Serve
Once the cheesecake is fully chilled, make the icing. In a small bowl, beat the softened cream cheese, powdered sugar, milk, and vanilla until smooth. Drizzle it over the top of the cheesecake right before serving.
Nutritional Info & Pairings
Let’s be real, this is not health food. But sometimes you just need to treat yourself.
| Nutrient | Approximate Amount |
|---|---|
| Calories | 750 kcal |
| Fat | 50g |
| Carbohydrates | 65g |
| Protein | 10g |
Meal Pairing: This cheesecake is the star of the show. It doesn’t need a meal. Just a big glass of cold milk or a hot cup of black coffee to cut through the richness.
Time-Saving Tip: You can make the crust dough and the cinnamon swirl mixture a day ahead. Just store them covered in the fridge. This breaks up the process and makes baking day feel less intense.
Tips for Leftovers and Storage
If you somehow have leftovers, which is a big “if,” here’s how to handle them.
Cover the cheesecake tightly with plastic wrap or store it in an airtight container in the refrigerator. It will stay fresh and delicious for up to 5 days.
You can also freeze it! Place individual slices on a baking sheet and freeze until solid. Then, wrap each slice in plastic wrap and then foil, and store in a freezer bag. It will last for up to a month. To thaw, just place a slice in the fridge overnight.
Frequently Asked Questions (FAQ)
Q1. My cheesecake cracked! What did I do wrong?
Ans: Don’t panic! It still tastes amazing. Cracks usually happen for a few reasons: the filling was overmixed, it was baked without a water bath, or it cooled down too quickly. Drizzle that cream cheese icing on top, and no one will ever know.
Q2. Can I use low-fat cream cheese to make it healthier?
Ans: I wouldn’t recommend it. Full-fat cream cheese is essential for that rich, creamy texture. Low-fat versions have more water and can result in a runny, less flavorful cheesecake. This is a go-big-or-go-home kind of dessert.
Q3. I don’t have a springform pan. Is there an alternative?
Ans: A springform pan is really the best tool for the job because it lets you remove the cheesecake easily. You could try a 9-inch deep-dish pie plate, but you’ll have to serve it directly from the dish. The presentation won’t be the same, but the taste will be there.
Q4. How do I know for sure when the cheesecake is done baking?
Ans: The “jiggle test” is your best guide. The outer 2-3 inches of the cheesecake should look set and matte, while the very center (about a 3-inch circle) should still wobble like Jell-O when you gently nudge the pan. It will continue to set as it cools.
Wrapping Up
So there you have it. The dessert hybrid you never knew you needed.
It takes a bit of time and a few steps, but the payoff is a seriously impressive dessert that will have everyone asking for the recipe. It’s the perfect thing for a holiday, a special occasion, or just a Tuesday when you feel like you deserve something spectacular.
Now it’s your turn. Give this recipe a try and see for yourself. I’d love to hear how it goes, so drop a comment below and let me know if you loved it, if you changed anything, or if you have any questions!