
“`html
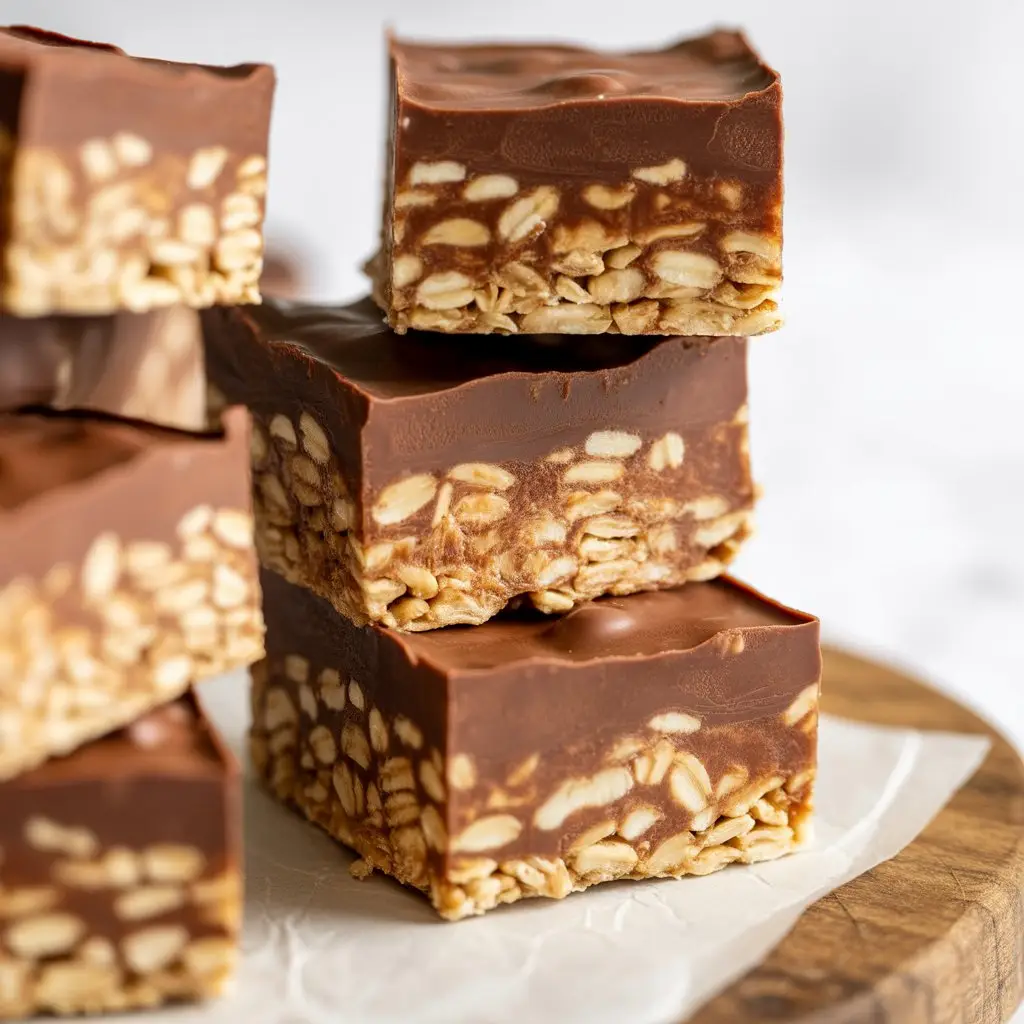
These No-Bake Chocolate Peanut Butter Bars Are My New Obsession
I have a confession to make. I have a MAJOR sweet tooth. Like, a see-a-cupcake-and-I-must-have-it kind of sweet tooth.
But I’m also trying to be, you know, a little healthier. It’s a constant battle between the angel on one shoulder telling me to eat a salad and the devil on the other offering me a brownie.
Usually, the devil wins. Not gonna lie.
That’s why I’m so ridiculously excited about these bars. They’re that perfect middle ground. They crush my chocolate and peanut butter cravings but don’t leave me feeling like I just ate a brick of sugar.
Plus, they’re no-bake. NO-BAKE. That means you don’t even have to turn on your oven. You just mix, press, chill, and eat. It’s almost TOO easy.
What You’ll Need
Here’s the simple stuff you’ll need to grab. Nothing too weird or hard to find, I promise.
- Rolled Oats: The old-fashioned kind works best here for texture.
- Crispy Rice Cereal: You know, the stuff that goes snap, crackle, and pop. This gives it the “crunch.”
- Natural Peanut Butter: The creamy, drippy kind. The only ingredients should really be peanuts and maybe salt.
- Maple Syrup: For a little bit of natural sweetness that isn’t just empty calories.
- Coconut Oil: This is what helps everything hold together.
- Vanilla Extract: Because vanilla makes everything better. It’s a fact.
- Dark Chocolate Chips: I like using dark chocolate to keep the sugar down, but you do you.
- A pinch of salt: It just balances all the sweetness.
Pro Tips
I’ve made these a few times now, and I’ve definitely learned a thing or two. Here are some tips so your first batch is perfect.
- Press FIRMLY. I mean it. When you put the crunch mixture into the pan, use the bottom of a glass or a spatula to press it down really, really well. This is the secret to bars that don’t crumble into a sad mess when you cut them.
- Don’t Scorch the Chocolate. When you’re melting the chocolate, do it in short bursts in the microwave (like 20-30 seconds at a time), stirring in between. It’s so easy to burn it, and burnt chocolate is just the worst.
- Line Your Pan. Seriously, don’t skip this. Leave a little parchment paper hanging over the sides of the pan. It acts like little handles so you can lift the whole block out easily for cutting. It’s a game-changer.
- Let Them Chill Completely. I know it’s tempting to cut into them right away, but they need time to set in the fridge. If you rush it, they’ll be gooey. Give them at least an hour, maybe two. Patience!
Tools Required
You probably already have all this stuff. Super simple.
- 8×8 inch baking pan
- Parchment paper
- Large mixing bowl
- Microwave-safe bowl
- Spatula or large spoon
- Measuring cups and spoons
Substitutions and Variations
Want to switch things up? Go for it. This recipe is pretty forgiving.
| Instead of… | Try Using… | Good to Know |
|---|---|---|
| Peanut Butter | Almond, Cashew, or SunButter | Taste will change slightly. |
| Maple Syrup | Honey or Agave Nectar | Honey isn’t vegan. |
| Crispy Rice Cereal | Puffed quinoa or corn flakes | Changes the “crunch” factor. |
| Dark Chocolate | Semi-sweet or milk chocolate | Will be a bit sweeter. |
How To Make These Awesome Bars
Alright, let’s get to the good part. This whole thing should take you less than 20 minutes of actual work.
Step 1: Line an 8×8 inch pan with parchment paper, letting some hang over the sides. This is your “get out of jail free” card for later.
Step 2: In a large bowl, mix together the rolled oats and crispy rice cereal. Just give them a good stir to combine.
Step 3: In a separate, microwave-safe bowl, combine the peanut butter, maple syrup, and 1 tablespoon of the coconut oil. Microwave for about 30-45 seconds, until it’s all melted and smooth when you stir it. Then stir in the vanilla and the pinch of salt.
Step 4: Pour the wet peanut butter mixture over the dry oat mixture. Stir everything together until it’s completely coated. It’s going to be sticky. That’s a good thing.
Step 5: Dump the sticky mixture into your prepared pan. Now, using your spatula or the bottom of a cup, press it down into an even, super-compact layer. Remember my pro tip? Press it like you mean it.
Step 6: For the chocolate topping, combine the dark chocolate chips and the remaining 1 tablespoon of coconut oil in a microwave-safe bowl. Microwave in 20-second intervals, stirring each time, until it’s totally melted and glossy.
Step 7: Pour the melted chocolate over the base layer in the pan. Use your spatula to spread it out evenly, all the way to the edges.
Step 8: Pop the whole pan in the refrigerator for at least 1-2 hours. You want the chocolate to be hard and the base to be firm.
Step 9: Once it’s chilled, use the parchment paper handles to lift the entire block out of the pan. Place it on a cutting board and slice it into bars or squares. Eat immediately.
Nutrition and Diet Swaps
Just so you know what you’re getting into. This is an estimate, of course.
| Estimated Nutrition (per bar) | |
|---|---|
| Calories | ~180-220 kcal |
| Protein | ~5g |
| Fat | ~12g |
| Carbs | ~15g |
Need to fit a specific diet? No problem.
| For This Diet | Do This |
|---|---|
| Gluten-Free | Use certified gluten-free rolled oats and crispy rice cereal. |
| Vegan | Use maple syrup (not honey) and ensure your chocolate chips are dairy-free. |
| Nut-Free | Swap peanut butter for sunflower seed butter (SunButter). |
Tips for Leftovers and Storage
If you somehow have leftovers (I rarely do), storing them is easy.
Just place the cut bars in an airtight container. They need to stay in the fridge, or the coconut oil and chocolate will get soft and messy. They should stay good in there for up to a week.
You can also freeze them! They’re great straight from the freezer on a hot day. Just separate layers with parchment paper so they don’t stick together.
Frequently Asked Questions
Q1. Why are my bars falling apart?
Ans: You probably didn’t press the base down firmly enough before chilling. Next time, really pack it in there! Also, make sure you let it chill long enough to completely set.
Q2. Can I use crunchy peanut butter?
Ans: You totally can! It will add some extra texture. Just make sure it’s the natural, drippy kind, otherwise the mixture might be too dry.
Q3. My chocolate topping cracked when I cut it. What did I do wrong?
Ans: Nothing! That’s pretty normal. The coconut oil in the chocolate helps, but it can still happen. To help prevent it, you can let the bars sit at room temperature for about 10 minutes before cutting, or run your knife under hot water first.
Q4. Can I reduce the amount of maple syrup?
Ans: You can, but just a little. The syrup doesn’t just add sweetness; it’s a binder that helps hold everything together. If you reduce it too much, the bars might be crumbly.
Wrapping Up
So there you have it. A super simple, ridiculously tasty treat that won’t totally derail your health goals. It’s the perfect solution for that 3 PM slump or that after-dinner sweet craving.
Seriously, give these a try. They’re a staple in my fridge now.
If you make them, I’d love to know how they turned out! Drop a comment below and tell me if you made any fun variations. Or if you have any questions, just ask!
“`