
Have you ever been stuck trying to decide between ordering mozzarella sticks or onion rings? It’s a tough choice, right? One is cheesy and gooey, the other is crispy and savory.
What if you didn’t have to choose? What if you could have both in one perfect, golden-brown bite? Well, you can.
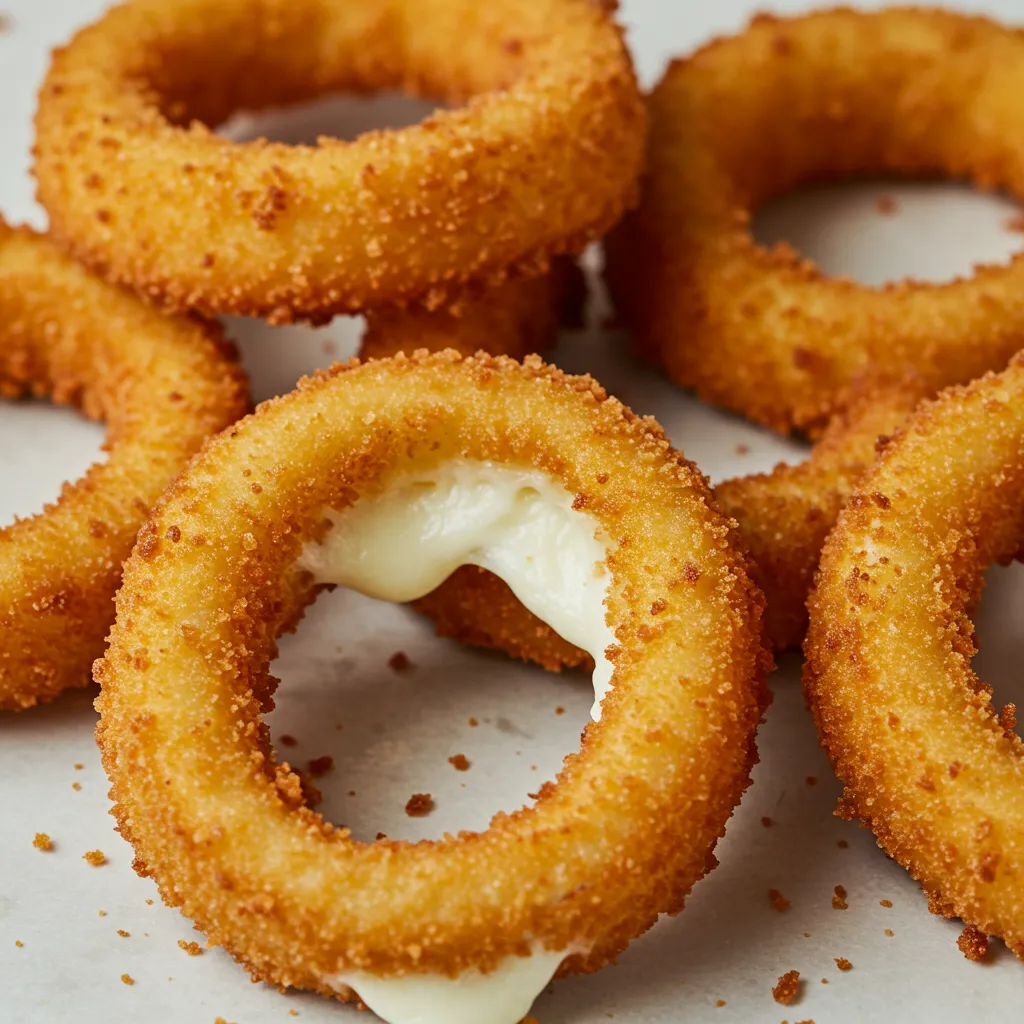
We’re about to make mozzarella stick onion rings. It sounds wild, but it’s super easy and honestly, it’s one of the best things you’ll ever pull out of a frying pan. Let’s get into it.
What You’ll Need
Here’s the simple stuff you need to grab from the store. Nothing fancy, I promise. It’s all about combining a few good things to make something great.
| Ingredient | Amount | Notes |
|---|---|---|
| Large Sweet Onions | 2 | Vidalia or similar sweet onions work best. |
| Mozzarella String Cheese | 12 sticks | The low-moisture kind is key here. |
| All-Purpose Flour | 1 cup | Just the regular stuff. |
| Eggs | 3 large | This helps the breading stick. |
| Panko Breadcrumbs | 2 cups | Panko gives you that extra crispy crunch. |
| Italian Seasoning | 1 tbsp | Or a mix of dried oregano and basil. |
| Garlic Powder | 1 tsp | For a little extra flavor. |
| Salt & Black Pepper | To taste | Don’t be shy with the seasoning. |
| Vegetable Oil | 4-6 cups | For frying. Any neutral oil works. |
Tools of the Trade
You don’t need a pro kitchen for this. Just a few basic tools will get the job done.
- Large, heavy-bottomed pot or Dutch oven
- Tongs
- Shallow bowls or pie plates (for breading)
- Wire rack
- Baking sheet
- Kitchen thermometer (super helpful but not a deal-breaker)
How to Make Mozzarella Stick Onion Rings
This is where the magic happens. Just follow these steps and you’ll be golden. Literally.
Step 1: First, prep your onions. Cut off the top and bottom, peel off the skin, and then slice them into thick rings, about 3/4-inch wide.
Step 2: Gently separate the rings. You’re looking for pairs that fit inside each other with a little gap. Place a smaller ring inside a larger one to create a channel.
Step 3: Cut your string cheese sticks into smaller pieces. Carefully stuff these cheese pieces into the channel between the two onion rings. Pack it in there good.
Step 4: Place all your cheese-stuffed rings on a baking sheet lined with wax paper and pop them in the freezer for about 30 minutes. This is a big deal! It helps the cheese stay put when you fry them.
Step 5: While they’re chilling, set up your breading station. You’ll need three shallow dishes. In the first, put the flour, salt, and pepper. In the second, whisk the eggs. In the third, mix the panko breadcrumbs, Italian seasoning, and garlic powder.
Step 6: Take the rings out of the freezer. Dip each ring first in the flour, then in the egg, and finally in the panko mixture. Press the breadcrumbs on to make sure they’re fully coated.
Step 7: For an extra-crispy coating that won’t let any cheese escape, dip them back in the egg and then again in the panko. A double coat is the secret.
Step 8: Heat your oil in a large pot to 350°F (175°C). If you don’t have a thermometer, drop a breadcrumb in. If it sizzles nicely, you’re ready.
Step 9: Fry the rings in small batches for 2-3 minutes per side, until they’re deep golden brown and crispy. Don’t overcrowd the pot, or the oil temperature will drop.
Step 10: Use tongs to remove the rings and place them on a wire rack to drain. Sprinkling a little extra salt on them while they’re hot is always a good move. Serve them hot with your favorite dipping sauce.
Pro Tips from My Kitchen
I’ve made these a bunch, and I’ve learned a few things. These little tricks make a big difference.
-
Don’t Skip the Freeze. I know, you want to eat them now. But freezing the stuffed rings for at least 30 minutes is the most important step. It solidifies the cheese so it doesn’t all melt out into the oil the second it gets hot.
-
The Double Dredge is Your Friend. A single coat of breading is okay, but a double coat is amazing. It creates a stronger, crispier shell that keeps all that gooey cheese locked inside where it belongs.
-
Watch Your Oil Temp. If the oil is too hot, the outside will burn before the inside is melted. If it’s too cool, the rings will soak up oil and get greasy. 350°F is the sweet spot. A thermometer helps, but the breadcrumb test works in a pinch.
Substitutions and Variations
Want to mix it up? Go for it. Cooking should be fun, so feel free to play around.
- Cheese: Pepper jack string cheese gives it a nice kick. Cheddar sticks work too, for a different flavor.
- Breading: Crushed cornflakes or even salty crackers can be used instead of panko for a different kind of crunch.
- Spices: Add a pinch of cayenne pepper or smoked paprika to the breadcrumb mix for some heat or smoky flavor.
- Air Fryer Method: You can totally make these in an air fryer. Just spray them with a bit of oil and cook at 375°F for about 8-10 minutes, flipping halfway. They won’t be as deep-fried crispy, but they’re still really good.
- Baked Method: To bake them, place the breaded rings on a greased baking sheet. Bake at 400°F for 15-20 minutes, flipping once, until golden and crispy.
Meal Pairing and Nutrition
These are awesome on their own, but they also play well with others.
| Serving Suggestions | Dietary Swaps |
|---|---|
| Classic marinara sauce for dipping. | Gluten-Free: Use a gluten-free flour blend and gluten-free panko breadcrumbs. |
| Ranch or blue cheese dressing. | Keto/Low-Carb: Swap flour with almond flour and breadcrumbs with crushed pork rinds. |
| Serve alongside burgers or grilled chicken. | Dairy-Free: This one is tough, but you could try a dairy-free mozzarella alternative. |
Nutritional Info (An Estimate)
This is just a rough idea because it depends on the size of your rings and how much oil they absorb.
| Nutrient | Amount per Serving (3 rings) |
|---|---|
| Calories | ~350 kcal |
| Fat | ~22g |
| Carbohydrates | ~25g |
| Protein | ~14g |
Leftovers and Storage
If you somehow have leftovers, here’s the best way to handle them.
Let them cool completely first. You can store them in an airtight container in the fridge for up to 2 days.
To reheat, don’t use the microwave! It will make them soggy. The best way is in an oven or air fryer at 375°F for 5-7 minutes until they’re hot and crispy again.
Frequently Asked Questions
Q1. Why did all my cheese leak out when I fried them?
Ans: Ah, the classic cheese explosion. This usually happens for two reasons. Either you skipped the freezing step, or your oil was not hot enough, so the rings sat in there too long. Freezing is key!
Q2. Can I make these ahead of time?
Ans: Yes! You can prepare the rings all the way through the breading step. Then, instead of frying, lay them on a baking sheet and freeze them solid. Once frozen, you can transfer them to a freezer bag for up to 2 months. Fry them straight from the freezer, just add an extra minute or two to the cooking time.
Q3. My breading keeps falling off. What am I doing wrong?
Ans: Make sure you shake off any excess flour before dipping in the egg. The flour helps the egg stick, and the egg helps the breadcrumbs stick. Also, be gentle when you’re moving them around in the breading and the oil.
Wrapping Up
So there you have it. A snack that solves one of life’s toughest decisions. They’re a little bit of work, but they are so worth it for that first cheesy, crunchy bite.
Go ahead and give them a try. I’d love to hear how they turn out for you. Let me know in the comments if you have any questions or if you tried any fun variations