
There are some desserts that just hit different. You know the ones. They aren’t trying to be super fancy or complicated, but they taste like a million bucks.
That’s exactly what these Raspberry Streusel Shortbread Bars are. They’re my go-to for pretty much any occasion. Potluck? Check. Sad Tuesday? Double check. Need to impress someone without actually trying too hard? This is your secret weapon.
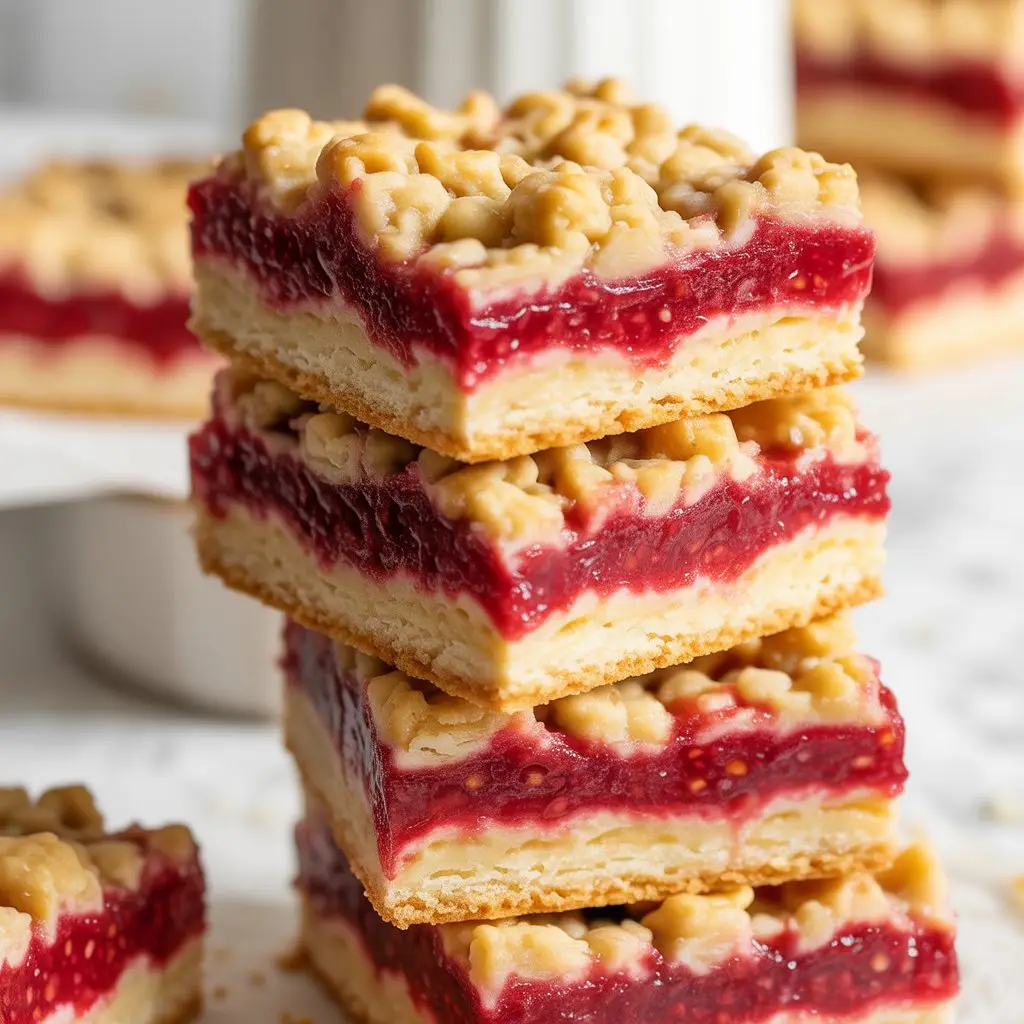
It all comes down to three perfect layers. A buttery, melt-in-your-mouth shortbread crust, a bright and tangy raspberry filling, and a crunchy, sweet streusel topping.
It sounds fancy, but I promise you, it’s one of the easiest things you’ll ever bake. So let’s get into it and make something amazing.
What You’ll Need
First things first, let’s gather up our ingredients. I like to break it down by layer so it feels less intimidating.
For the Shortbread Base:
- 1 cup (2 sticks) unsalted butter, cold and cubed
- 2 cups all-purpose flour
- 1/2 cup granulated sugar
- 1/4 teaspoon salt
- 1 teaspoon vanilla extract
For the Raspberry Filling:
- 2 cups fresh or frozen raspberries
- 1/4 cup granulated sugar
- 2 tablespoons cornstarch
- 1 tablespoon lemon juice
For the Streusel Topping:
- 1 cup all-purpose flour
- 1/2 cup packed brown sugar
- 1/2 cup old-fashioned rolled oats (not instant!)
- 1/2 teaspoon ground cinnamon
- 1/2 cup (1 stick) unsalted butter, cold and cubed
Pro Tips
I’ve made these bars more times than I can count, and I’ve learned a few things along the way. Here are some tips to make sure yours come out perfect on the first try.
Keep Your Butter Cold. This is the most important rule for both the shortbread and the streusel. Cold butter creates little pockets of steam when it bakes, which is what gives you that perfect flaky, crumbly texture. If your butter is soft, the crust will be dense and the topping will melt.
Don’t Overmix the Crust. When you’re mixing the shortbread ingredients, stop as soon as it looks like wet sand. If you mix it too much, you’ll overwork the gluten in the flour and end up with a tough, hard crust instead of a tender one.
Sprinkle, Don’t Press. When you add the streusel topping, gently sprinkle it over the raspberry layer. It’s tempting to press it down into the jam, but don’t do it! A light hand ensures the topping stays crumbly and distinct, giving you that amazing textural contrast.
Patience is a Virtue (Especially for Cutting). The hardest part of this recipe is waiting for the bars to cool down completely before you slice them. I know, it’s torture. But if you cut them while they’re still warm, the raspberry filling will ooze everywhere and you’ll have a delicious mess instead of clean, pretty bars.
Tools Required
You don’t need a bunch of fancy gadgets for this. Here’s the basic rundown of what to grab from your kitchen.
- 9×13 inch baking pan
- Parchment paper
- A few mixing bowls (at least two)
- Measuring cups and spoons
- A pastry blender or two forks (or your hands!)
- A small saucepan
- A knife for cutting
- An offset spatula or the back of a spoon
Substitutions and Variations
One of the best things about this recipe is how easy it is to change things up based on what you have or what you’re in the mood for. Here are a few ideas.
| Original Ingredient | Substitution Idea | Quick Note |
|---|---|---|
| Raspberries | Any berry! Strawberries, blueberries, blackberries. | You can also use good quality jam or preserves. |
| All-Purpose Flour | 1:1 Gluten-Free Baking Flour | Make sure your blend contains xanthan gum. |
| Brown Sugar | Coconut Sugar or Maple Sugar | Will add a slightly different, delicious flavor. |
| Rolled Oats | Chopped nuts like pecans or walnuts. | Adds a fantastic crunch to the streusel. |
How to Make Raspberry Streusel Shortbread Bars
Alright, time for the fun part. Let’s bake.
Step 1: Preheat your oven to 375°F (190°C). Line a 9×13 inch baking pan with parchment paper, leaving some overhang on the sides. This will act as a handle to lift the bars out later.
Step 2: Let’s make the shortbread base. In a medium bowl, whisk together the 2 cups of flour, 1/2 cup of sugar, and 1/4 teaspoon of salt.
Step 3: Add the cold, cubed butter and the vanilla extract. Using a pastry blender, two forks, or your fingertips, cut the butter into the flour mixture until it resembles coarse, damp crumbs. Don’t overdo it!
Step 4: Dump the crumb mixture into your prepared pan. Press it down firmly and evenly to form the crust. I use the bottom of a measuring cup for this. Bake for 15-20 minutes, until the edges are just barely golden.
Step 5: While the crust is baking, make the raspberry filling. In a small saucepan, combine the raspberries, 1/4 cup sugar, cornstarch, and lemon juice. Cook over medium heat, stirring often, until the mixture thickens and bubbles. This usually takes about 5-7 minutes. Set it aside to cool slightly.
Step 6: Now for the streusel. In another bowl (or just reuse your crust bowl, I won’t tell), combine the 1 cup of flour, brown sugar, rolled oats, and cinnamon. Add the cold, cubed butter.
Step 7: Again, use your pastry blender or fingertips to cut the butter in until you have a crumbly mixture with some pea-sized chunks of butter remaining. That’s the good stuff.
Step 8: Assembly time! Once the crust is out of the oven, carefully spread the raspberry filling over the hot crust in an even layer.
Step 9: Sprinkle the streusel topping evenly over the raspberry layer. Remember the pro tip: don’t press it down!
Step 10: Return the pan to the oven and bake for another 25-30 minutes. You’ll know it’s done when the streusel is golden brown and the raspberry filling is bubbly around the edges.
Step 11: Let the pan cool completely on a wire rack. I’m talking completely. A couple of hours at least. Then, use the parchment paper handles to lift the whole thing out of the pan and cut it into bars.
More Than Just a Dessert Bar
Here’s a little more info to help you make these bars fit your life perfectly.
Nutritional Info (An Estimation)
Just a heads up, this is a rough estimate. The actual numbers will change based on your specific ingredients. But it gives you a general idea.
| Nutrient | Approx. Amount (per bar) |
|---|---|
| Calories | 250-300 kcal |
| Fat | 15g |
| Carbohydrates | 28g |
| Sugar | 15g |
| Protein | 3g |
Making it Diet-Friendly
For a Vegan Version: This is surprisingly easy. Just swap the unsalted butter for a high-quality vegan butter that comes in sticks. Make sure it’s cold, just like the real thing.
For a Gluten-Free Version: Use a good “cup-for-cup” or “1-to-1” gluten-free all-purpose flour blend. These already have xanthan gum mixed in, which helps with the structure. Also, make sure your oats are certified gluten-free if you have a serious sensitivity.
Serving and Efficiency
These bars are honestly perfect on their own. But if you want to be a little extra, serve one slightly warmed up with a scoop of vanilla bean ice cream. It’s next level.
To save time, you can make the streusel topping a day or two ahead. Just keep it in an airtight container in the fridge. You can also assemble the entire thing (crust, filling, topping) and freeze the unbaked bars for up to a month. Just bake from frozen, adding about 10-15 minutes to the baking time.
Leftovers and Storage
If you somehow have leftovers, storing them is simple.
You can keep the bars in an airtight container at room temperature for up to 3 days. The streusel will stay the crunchiest this way.
If you want them to last a bit longer, they’ll keep in the fridge for about a week. The crust might soften slightly, but they’ll still be delicious.
These also freeze beautifully! Just place the cut bars in a single layer in a freezer-safe container or bag. They’ll be good for up to 3 months. Let them thaw at room temperature for an hour or so before enjoying.
Frequently Asked Questions
Q1. My shortbread crust was hard, not crumbly. What went wrong?
Ans: This usually happens for two reasons. Either the butter wasn’t cold enough, or the dough was overmixed. Overmixing develops the gluten in the flour, making it tough. Just mix until it looks like crumbs, and you’ll be golden.
Q2. Can I use raspberry jam instead of making the filling?
Ans: Absolutely! It’s a great shortcut. Use a good quality, thick raspberry preserve or jam. You’ll need about 1 and 1/2 cups. Just spread it right onto the pre-baked crust.
Q3. My streusel topping kind of melted and wasn’t crumbly. Why?
Ans: Again, it all comes back to the butter. Your butter for the streusel was probably too soft. You want it cold and cubed so it holds its shape and creates that perfect crumbly texture as it bakes.
Q4. My raspberry layer made the bottom crust soggy. How can I prevent that?
Ans: The pre-baking step is key here. Make sure your crust is lightly golden brown before you add the filling. This creates a bit of a seal that helps prevent the moisture from the berries from seeping in. Also, letting the filling cool for a few minutes before spreading it can help.
Wrapping Up
So there you have it. A simple, no-fuss recipe for what might just become your new favorite dessert. It’s the kind of thing that makes people think you’re a baking genius, and we’ll just keep it our little secret how easy it actually is.
Baking should be fun, not stressful. It’s about creating something delicious that you can share with people you care about, or just enjoy by yourself on the couch. No judgment here.
I really hope you give these a try. And if you do, I’d love to hear about it! Drop a comment below and let me know how they turned out, or if you tried any fun variations. I love hearing from you.