
“`html
Okay, let’s just get this out of the way. Some days you need a green smoothie. And some days you need a cake so ridiculously good it makes you forget your own name for a second.
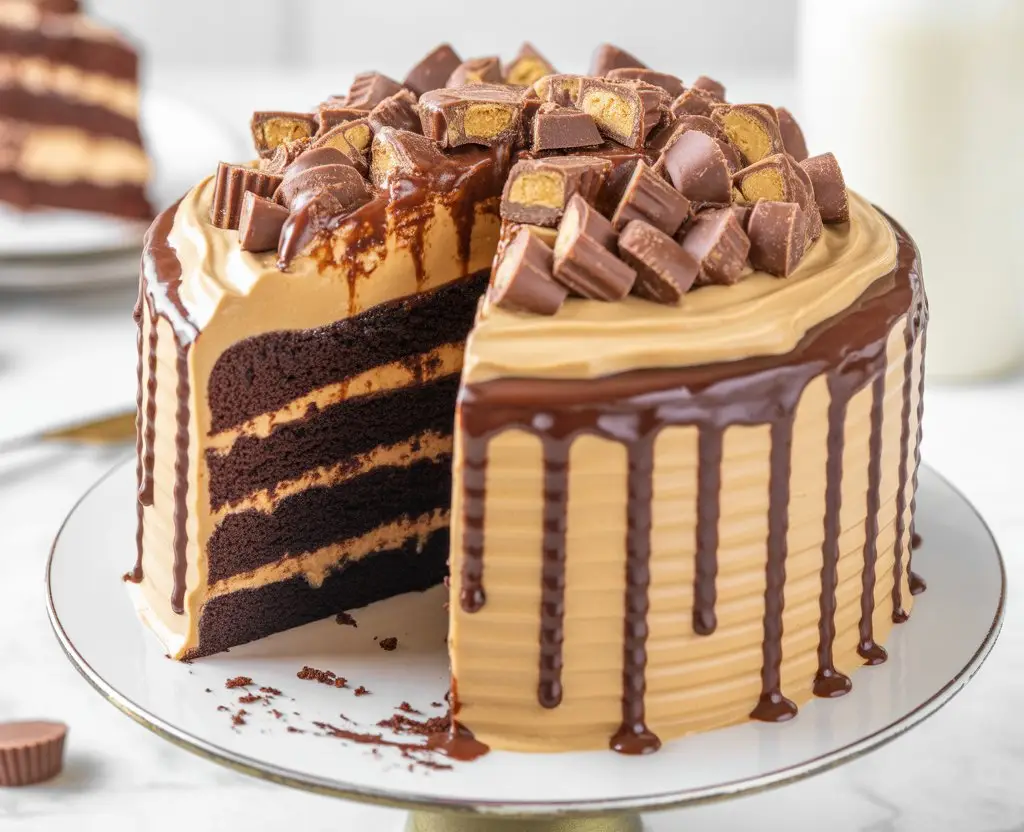
This is that cake.
We’re talking about a deep, dark chocolate cake that’s so moist it’s borderline scandalous. Then we’re going to slather it with a peanut butter frosting so creamy and light you’ll want to eat it with a spoon. And we’re not stopping there.
This is the cake you make when you want to celebrate something big. Or when you’ve had a tough week. Or when it’s Tuesday. There doesn’t need to be a reason, honestly.
So, if you’re ready to make a dessert that will have everyone asking for the recipe, you’re in the right place. Let’s do this.
What You’ll Need
First things first, let’s get all our ingredients lined up. It looks like a lot, but a lot of it is probably already in your pantry. Breaking it down makes it way less intimidating.
For the Chocolate Cake:
- 2 cups all-purpose flour
- 2 cups granulated sugar
- 3/4 cup unsweetened cocoa powder (the good stuff, if you can!)
- 2 teaspoons baking soda
- 1 teaspoon baking powder
- 1 teaspoon salt
- 1 cup buttermilk (or 1 cup milk + 1 tbsp lemon juice, let it sit for 5 mins)
- 1/2 cup vegetable oil
- 2 large eggs, at room temperature
- 1 teaspoon vanilla extract
- 1 cup boiling water (or very hot coffee)
For the Peanut Butter Frosting:
- 1 cup unsalted butter, softened to room temperature
- 1 cup creamy peanut butter (like Jif or Skippy, not the natural kind)
- 3-4 cups powdered sugar
- 1/3 cup heavy cream or milk
- 1 teaspoon vanilla extract
- A pinch of salt
For the Toppings:
| Component | Ingredient | Amount |
|---|---|---|
| Ganache Drip | Semi-sweet chocolate chips | 1/2 cup |
| Ganache Drip | Heavy Cream | 1/2 cup |
| Decoration | Reese’s Peanut Butter Cups | 1 cup, chopped |
Pro Tips
I’ve made a few… okay, a lot of cakes in my time, and I’ve learned some things the hard way. Here’s how you can skip the mistakes and get right to the good part.
- Don’t Overmix the Batter: This is the number one cake killer. Once you combine the wet and dry ingredients, mix only until they’re just combined. A few little lumps are totally fine. Overmixing develops gluten and makes the cake tough.
- Room Temperature is Key: For the frosting, your butter and eggs MUST be at room temperature. Cold butter makes lumpy frosting, and no one wants that. Take them out of the fridge an hour or two before you start.
- Let The Cake Cool. No, Really: I know it’s tempting to frost a warm cake, but it’s a recipe for a sliding, melting disaster. Let the cake layers cool completely on a wire rack. Be patient. It’s worth it.
- Hot Coffee for the Win: Using hot coffee instead of boiling water in the cake batter doesn’t make the cake taste like coffee. It just makes the chocolate flavor deeper and richer. Trust me on this one.
Tools Required
You don’t need a professional kitchen, just a few basics.
- Two 9-inch round cake pans
- Mixing bowls (a few different sizes)
- Whisk
- Electric mixer (stand or hand mixer)
- Rubber spatula
- Measuring cups and spoons
- Wire cooling rack
- Offset spatula for frosting (makes it so much easier!)
The Step-by-Step Guide to Perfection
Alright, let’s break this down into manageable chunks. We’ll make the cake, then the frosting, and then put it all together. It’s easier than it looks.
Part 1: Making the Chocolate Cake
Step 1: Preheat your oven to 350°F (175°C). Grease and flour your two 9-inch cake pans. You can also line the bottom with parchment paper for extra insurance against sticking.
Step 2: In a large bowl, whisk together the flour, sugar, cocoa powder, baking soda, baking powder, and salt. Get all those dry ingredients nice and combined.
Step 3: In a separate medium bowl, whisk together the buttermilk, oil, room temperature eggs, and vanilla extract.
Step 4: Pour the wet ingredients into the dry ingredients. Mix on low speed with your electric mixer (or by hand) until just combined. Remember what I said about not overmixing!
Step 5: Carefully pour the boiling water (or hot coffee) into the batter and mix on low speed until just incorporated. The batter will be very thin. This is normal! Don’t panic.
Step 6: Pour the batter evenly between your two prepared cake pans. Bake for 30-35 minutes, or until a wooden skewer or toothpick inserted into the center comes out clean.
Step 7: Let the cakes cool in the pans for about 10-15 minutes before turning them out onto a wire rack to cool completely. And I mean completely.
Part 2: Whipping Up the Peanut Butter Frosting
Step 1: In a large bowl, using an electric mixer, beat the softened butter until it’s smooth and creamy. This usually takes a minute or two.
Step 2: Add the creamy peanut butter and the pinch of salt. Beat again until it’s fully combined and fluffy.
Step 3: Gradually add the powdered sugar, one cup at a time, mixing on low speed until it’s incorporated. The mixture will get thick.
Step 4: Add the vanilla and the heavy cream (or milk). Start the mixer on low, then increase the speed to medium-high and beat for 3-5 minutes until the frosting is light, airy, and super smooth.
Part 3: Assembling the Masterpiece
Step 1: Place one cooled cake layer on your serving plate or cake stand. Scoop a generous amount of frosting onto it—about 1.5 cups—and spread it evenly with your offset spatula.
Step 2: Carefully place the second cake layer on top. Apply a thin layer of frosting all over the top and sides of the cake. This is called a “crumb coat” and it traps any loose crumbs. Pop the cake in the fridge for 20-30 minutes to set.
Step 3: Once the crumb coat is firm, frost the entire cake with the remaining peanut butter frosting. Make it as smooth or as swirly as you like.
Step 4: For the ganache, place the chocolate chips in a heat-proof bowl. Heat the heavy cream in the microwave or on the stovetop until it’s just simmering. Pour the hot cream over the chocolate chips and let it sit for 5 minutes. Whisk until it’s completely smooth.
Step 5: Let the ganache cool for about 10 minutes, then drizzle it over the top edges of the cake, letting it drip down the sides. Pile the chopped Reese’s cups in the center. Chill the cake for at least 30 minutes to let everything set before slicing.
Possible Substitutions and Variations
Want to mix things up? I get it. Here are a few ideas.
| Swap Idea | How to Do It | Heads Up |
|---|---|---|
| Go Gluten-Free | Use a 1:1 gluten-free baking flour blend. | The texture might be a bit denser. |
| Time Crunch | Use a high-quality devil’s food cake mix. | No shame! Just focus on the homemade frosting. |
| Different Candy | Top with chopped Butterfingers or Snickers. | This is your cake. Go wild. |
| Dairy-Free | Use plant-based butter, buttermilk, and cream. | Check frosting consistency; may need less liquid. |
Make-Ahead & Efficiency Tips
Making a layer cake can feel like a big project, but you can totally break it up.
Make-Ahead: The cake layers can be baked a day ahead. Once they’re completely cool, wrap them tightly in plastic wrap and keep them at room temperature.
The frosting can also be made up to 3 days in advance and stored in an airtight container in the fridge. Just let it come to room temperature and give it a quick whip before using it.
Efficiency: While the cakes are baking, you can measure out all your frosting ingredients. While the cakes are cooling, you can make the frosting. Work smarter, not harder!
Leftovers and Storage
If you somehow have leftovers, here’s what to do.
Store the cake in an airtight container in the refrigerator for up to 4-5 days. The frosting has dairy, so the fridge is its friend.
For the best taste, let a slice sit out at room temperature for about 20-30 minutes before eating. It takes the chill off the cake and frosting. You can also freeze individual slices wrapped tightly in plastic wrap and then foil for up to 2 months.
Frequently Asked Questions
Q1. My cake came out dry. What did I do wrong?
Ans: This is usually one of two things: overbaking or overmixing. Use a toothpick to check for doneness right at the 30-minute mark. For mixing, stop as soon as the flour disappears. A dry cake is a sad cake, and we can prevent it!
Q2. Can I use natural peanut butter for the frosting?
Ans: I wouldn’t recommend it. Natural peanut butter tends to separate and can make the frosting oily or gritty. A standard creamy peanut butter like Jif or Skippy gives you that perfectly smooth, stable texture.
Q3. My ganache is too thick/thin. How do I fix it?
Ans: Super easy fix. If it’s too thick, whisk in more warm heavy cream, a teaspoon at a time. If it’s too thin, add more chocolate chips and whisk until they melt and the ganache thickens.
Q4. Do I really need to use buttermilk?
Ans: You don’t have to go buy a whole carton. You can make a quick substitute! Just add 1 tablespoon of lemon juice or white vinegar to 1 cup of regular milk. Let it sit for 5-10 minutes. The acid in buttermilk helps make the cake incredibly tender, so it’s worth the tiny extra step.
Wrapping Up
And there you have it. A show-stopping, jaw-dropping Reese’s Peanut Butter Chocolate Cake that tastes even better than it looks.
Seriously, don’t be intimidated by the layers or the different components. It’s just mixing and baking. You can do this. The reward is so, so worth it.
So go on, give it a try. And when you do, I’d love it if you came back and left a comment. Let me know how it went, if you made any changes, or if you have any questions. I love hearing from you guys!
“`